Averting Disaster - A Guide To Computer Backups (2014)
by Brett Howse on May 21, 2014 9:00 AM EST- Posted in
- IT Computing
- Mac
- Apple
- Windows
- Cloud Computing
- macOS
Built-in Backup Tools Windows 8.1
While Windows 7 and Vista had the Backup and Restore applet, Windows 8 introduced File History as the default backup option. File History is a replacement for Previous Versions from Windows Vista and Windows 7. Unlike Windows 7, File History does allow backup to network shares for all versions of Windows 8 which is a good thing and makes the software far more useful. The downside is that scheduled System Backups have been removed from Windows 8 and 8.1. You can still manually create a system backup, and you can perform a system backup to a network share, but you can’t schedule this to be run. Also, File History only performs a backup of files in your libraries (Documents, Music, Pictures, Videos, and Desktop folders), as well as any files saved locally from OneDrive. Still, the most important information on your computer is your files, so let’s look at how to enable this feature to protect them:
- Windows 8.1 adds the ability to enable File History from PC Settings, however the options are just to enable File History and to select a backup target, so these instructions will focus on the Control Panel applet which offers more advanced options. To launch File History, right click the Start button and choose Control Panel. Next expand System and Security and select Save backup copies of your files with File History.
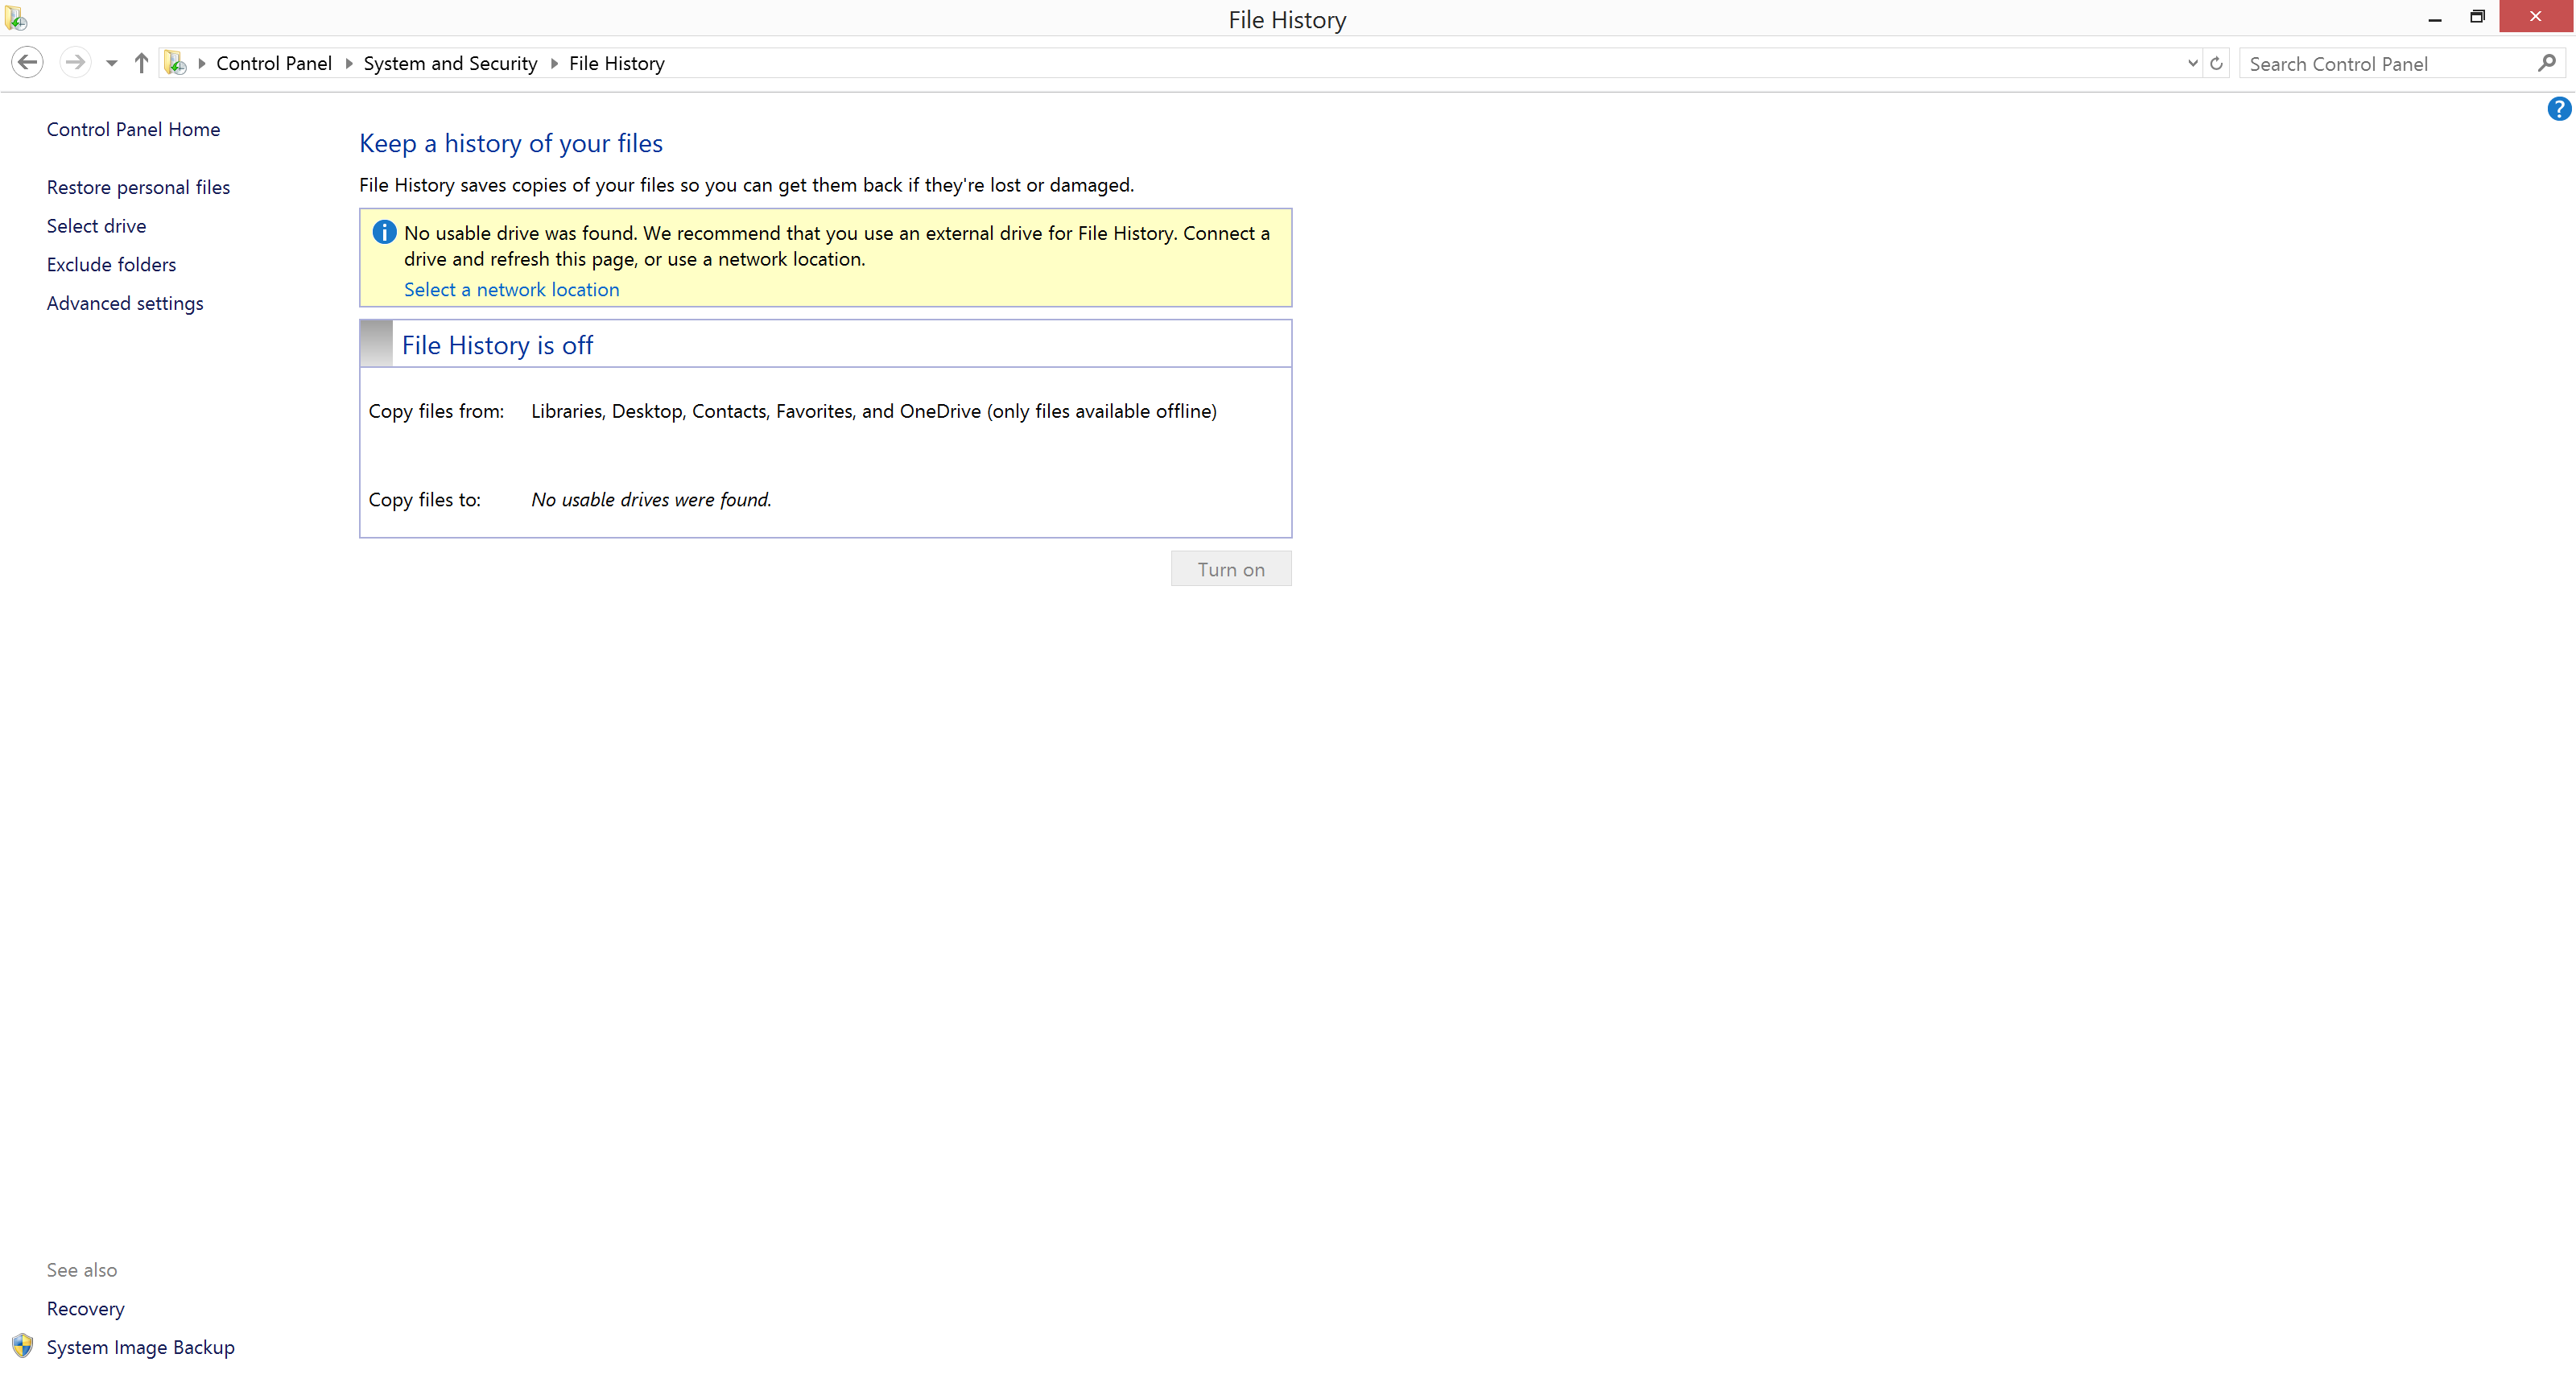
- If File History has never been configured before, the system will scan for available disks that it can back up to. You can choose the disk, or use the link Select a network location to configure the disk.

- Once configured, simply click Turn On, and File History is enabled.
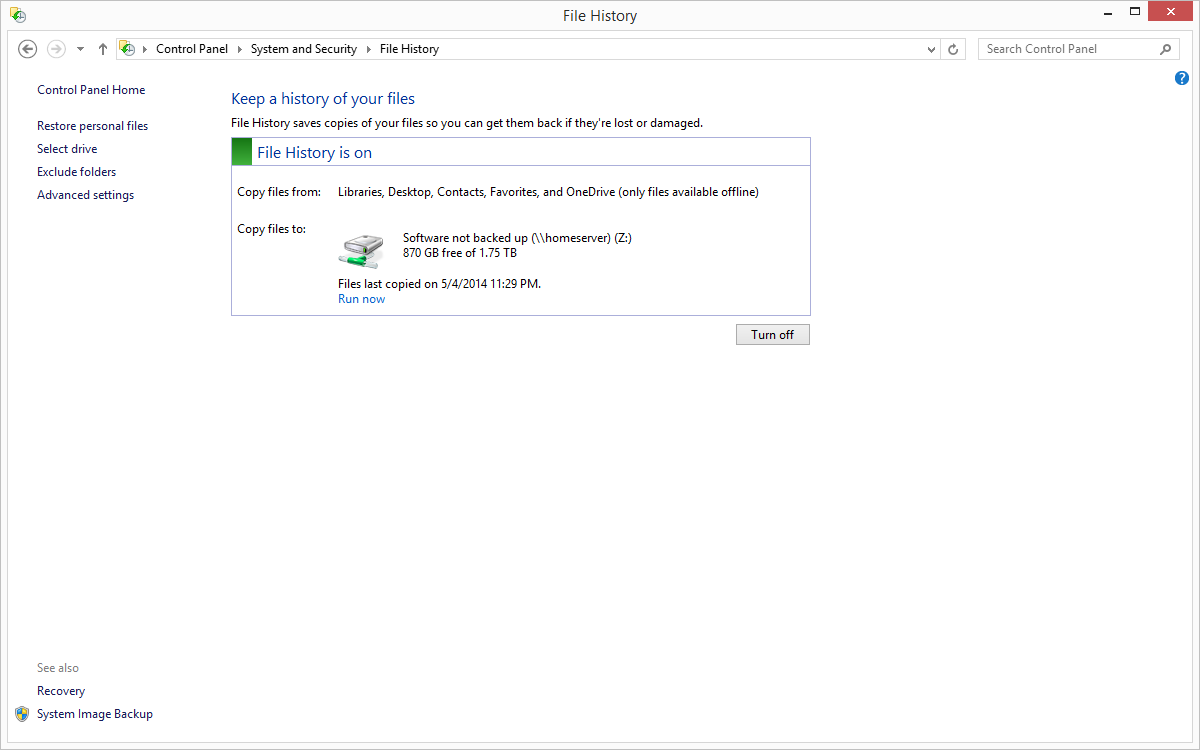
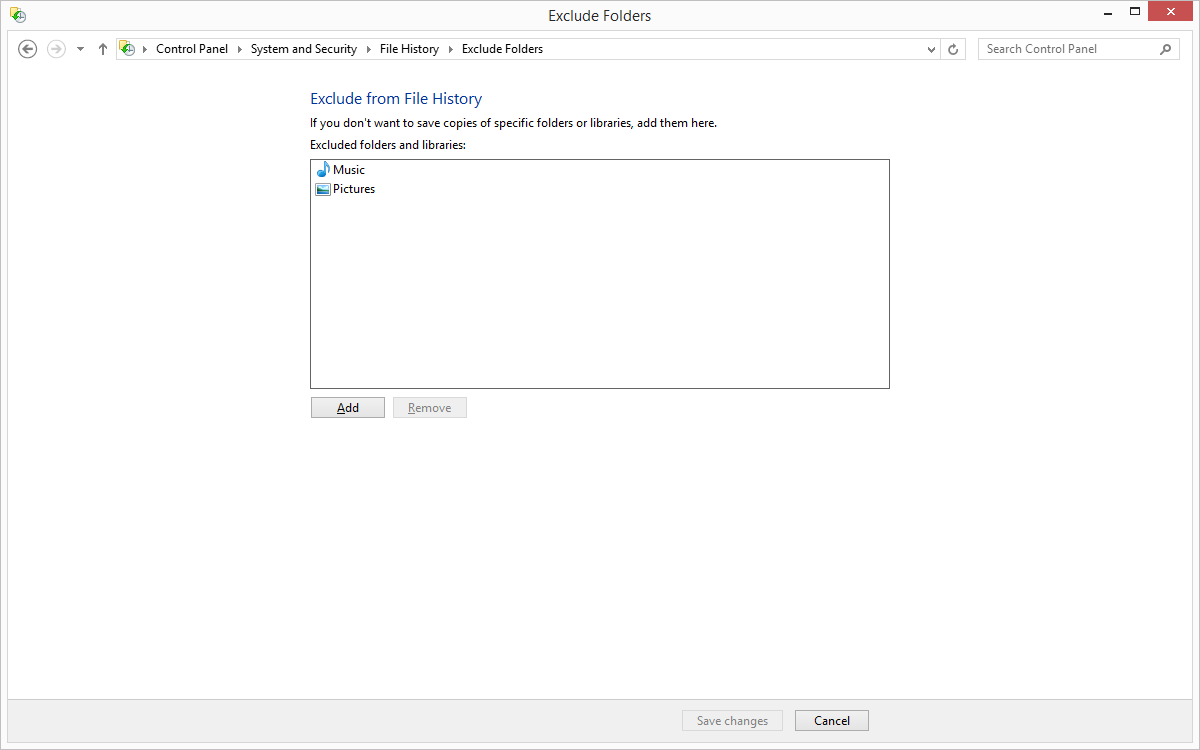
- If you’d like to modify your File History settings, that can be done in the File History applet. To exclude folders, choose Exclude Folders where you can select folders you wish to exclude from the backup. Unfortunately, you can’t add user defined folders here which you do want backed up. To add folders to be backed up, you either have to add that folder to an existing library, or create a new library.
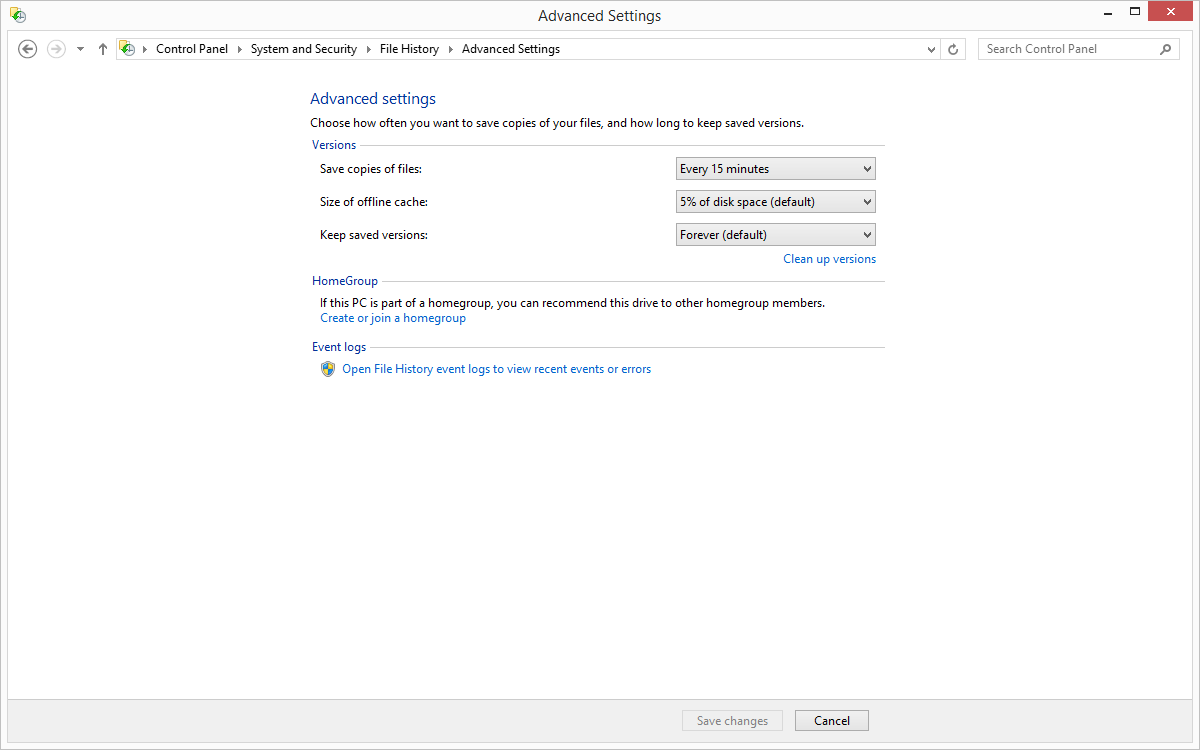
- Advanced settings are also available in the File History applet, and these allow you to specify how often to run the File History backup (from ten minutes to daily) as well as specify how much of the PC’s disk to use as an offline cache (2% to 20%) in the event you are travelling and not able to access your backups, as well as to specify how many versions of files to keep.


Unlike Windows 7, File History’s interface is all in the control panel. It’s not as elegant as Previous Versions was, where you could right click any file or folder and see a list of all versions, but the interface is fairly straightforward and does show you a list of all of the backups:
- Launch File History by right clicking the Start button and opening the Control Panel. Next expand System and Security and select Restore your files with File History.
- The interface that opens up will be a listing of the locations you are backing up. The most recent backup will be displayed by default. To restore a file, navigate to the folder it was in, select the file by clicking it, and then press the green Restore button to restore it to the original location.
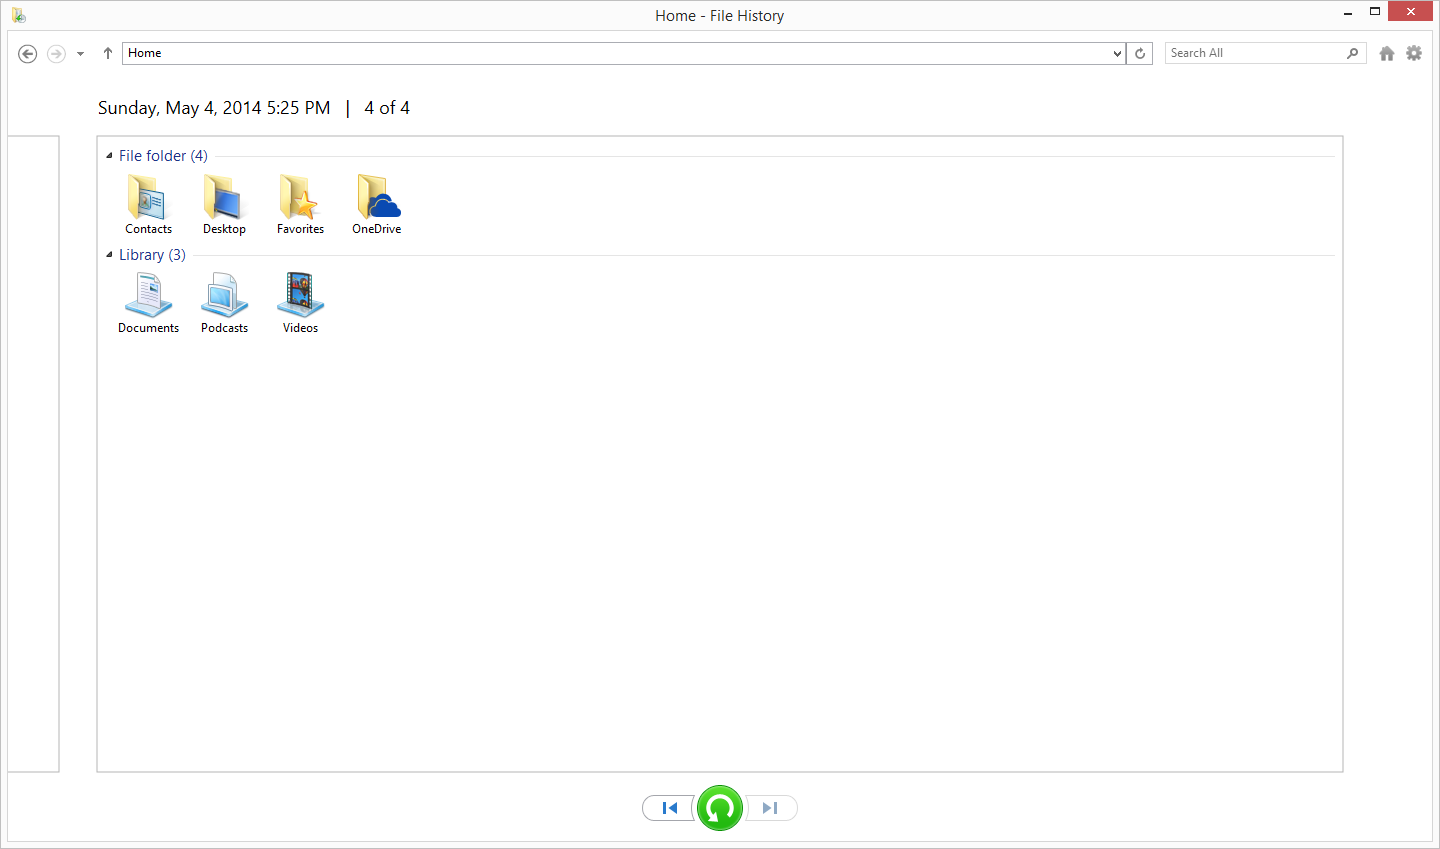
- If you’d like to restore it to a different location, right click the file and choose Restore To and then browse to your path.
- To navigate through your backups, you can use the skip buttons at the bottom of the page. The easiest way to sort though is to navigate to the folder where your file is (or was), and it will display only the backups that have changes in them. If a folder hasn’t been modified since you enabled File History, there will only be one backup for it. This is an easier method than trying to figure out which day you deleted a file.
Overall, File History is a decent built-in utility, but as is often the case, attempts to make the process easier to use often result in a system that is less powerful, and that’s certainly the case with this. Windows 7 lacked network backup for some versions, but overall the Windows 7 backup utility offered more features, especially with the automatic system backup. Previous Versions is also an easier way to find changes made to a file. File History also lacks a method of backing up files outside of your libraries and OneDrive folders which is not ideal by any means. Windows 8.1 forces you to make a system backup manually, and that can be done as so:
- Right click the Start button and open Control Panel. Expand System and Security, and then select Save backup copies of your files with File History which won’t actually be used, but is the shortcut to the System image backup.
- On the File History applet, click on System Image Backup in the bottom left corner.
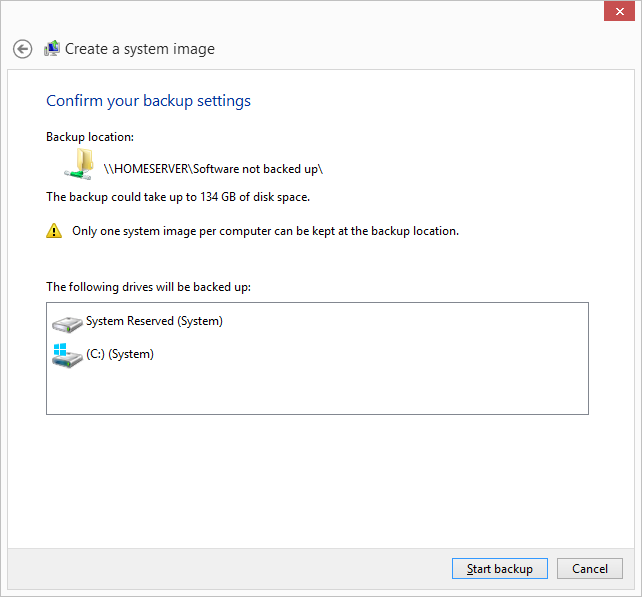
- Choose a location for your backup. If it’s on a network share, you can optionally enter login credentials if required. Click Next.

- Now you will be prompted to confirm, and if you are happy click Finish. The confirmation dialog will estimate how much disk space will be required, and warn you that only a single backup file will be kept. In other words, there is no versioning.
If you are using File History as your backup method of choice, you should definitely create at least one system backup to allow you to restore to a new hard drive or machine if necessary. If you ever need to restore this, you can create a recovery drive by choosing the Recovery option in the File History applet. If you don’t have another computer to create this on if needed, it’s a good idea to create one ahead of time.
It is possible to create full scheduled backups, but only from the command line using wbadmin but this is not something I would recommend for the average user.


133 Comments
View All Comments
patrickjchase - Thursday, May 22, 2014 - link
ZFS RAIDZ implements strong checksums within each drive, such that it can reliably detect if a drive is returning bad data and ignore it. In some respects it's actually stronger than RAID6 in terms of its ability to deal with silent corruption. That's why NonSequitor wrote "double parity OR checkums" (RAID6 is double-parity, RAIDZ is single-parity augmented with strong per-disk, per-chunk checksums).If you're halfway competent then it's not "extremely likely" that you'll encounter unreadable sectors during a RAID5 rebuild. There's a reason why both good RAID controllers and ZFS implement scrubbing (i.e. they can periodically read every disk end to end and remap any unreadable sectors). If you do that every couple days then the likelihood of encountering a new (since the last scrub) unreadable sector may or may not be high depending on your rebuild time.
For example I have a 5-disk RAID5 array that I use for "cold" storage. I scrub it daily, and rebuilding to a hot-spare takes 6 hours (I've tested it several times, verifying the results against separate copies of the same files), which means that the maximum delay between the most recent scrub and the end of a rebuild is 30 hrs. The scrubs have only found one bad sector in ~2 years, so I respectfully submit that the likelihood of an additional failure within 30 hours of a scrub is pretty darned low.
beginner99 - Thursday, May 22, 2014 - link
exactly. anything above 2 TB drives becomes really problematic in this regard. With 4 TB drives it's almost guaranteed a RAID-5 rebuild will fail. IMHO if you do RAID, do RAID-1.patrickjchase - Thursday, May 22, 2014 - link
RAID1 has exactly the same problems as RAID5 - In the case of silent corruption it can't determine which disk is bad, and it's vulnerable to a single disk failure during a rebuild. The likelihood of such a failure is obviously lower (now you only have to worry about 1 other disks instead of 2 or more) but not hugely so. RAID6/RAIDZ2 is statistically much better until you get up to really high drive counts.The "big boys" with truly mission-critical data do N-way replication, i.e. all critical data is replicated (n>=3) times on different systems.
jimhsu - Wednesday, May 21, 2014 - link
+1 to crashplan. For my most important data, I have n+2 backups: n being the number of computers I have (meaning that Onedrive automatically syncs them); 2 being a crashplan online subscription as well as a local crashplan backup. I also have restore previous versions running, and use it on occasion, but don't consider it a backup per se.pjcamp - Wednesday, May 21, 2014 - link
I plowed through all the competitors a few years ago, and Crashplan was the one I selected. It had the cheapest unlimited storage with version history, and the (for me) killer feature that there exists a Linux client. I have a FreeNAS box that I use for media storage. I can mount it as a drive on my Linux machine and the Crashplan client will back it up just as if it were a local drive. There is also an Android client that gives you access to all your files, functioning as a sort of personal Dropbox, without sharing but with better security.I've had occasion to use my backups a couple of times and found it easy and speedy, much more so than I expected for a cloud service.
cknobman - Wednesday, May 21, 2014 - link
Everything in my house goes to a personally built server onto dedicated RAID storage drives. No accounts other than my personal administrator account have access to do anything but read.Those drives are then backed up to the cloud via CrashPlan.
Simple, effective, and as foolproof as I can get for now.
uhuznaa - Wednesday, May 21, 2014 - link
One thing to note with Time Machine: You don't need to use the fancy interface for restoring files. Just browse your backup disk with the Finder (or on the command line), there's a directory for every backup from which you can just copy things over.To CrashPan: I used that for a while, but found it to be utterly uncontrollable. The log files are a joke, the status mails arrive at random times (or not at all) and are useless ("Files: 117k, Backed Up: 99.9%") and often enough when a backup didn't run for some reason it's impossible to debug because there's no real error reporting. It may work somehow, but it has all the marks of something I don't want to rely on.
NCM - Wednesday, May 21, 2014 - link
Yes, that's indeed a big point for Apple's TimeMachine — that and it being included free with every Mac. If necessary you can just go digging into a TM archive and pull out what you need.SkateboardP - Wednesday, May 21, 2014 - link
Hi Brett,great guide but can you or others please check if the OneDrive backupsolution is throttled and capped at 355kb/s under win8.1 (Desktop)? I read that many people complaining about that. Thanks.
plext0r - Wednesday, May 21, 2014 - link
I've been using Duplicati for a few years and it has been good. "It works with Amazon S3, Windows Live SkyDrive, Google Drive (Google Docs), Rackspace Cloud Files or WebDAV, SSH, FTP (and many more)." It uses rsync under the covers and I use it to backup to my RAID-5 NAS in the basement. I also perform offsite backups (rotate 1TB disks to and from my workplace).