The MSI Z170A Gaming M7 Review: The Step Up to Skylake
by Ian Cutress on September 21, 2015 12:30 PM EST- Posted in
- Motherboards
- Gaming
- MSI
- Skylake
- Z170
MSI Z170A Gaming M7 BIOS
When MSI launched their second graphical BIOS/UEFI interface, it was quickly praised as implementing more ‘user experience’ than some of the other options on the market. At the time it used more color, different icon placement, and something a bit more than just tabs at the top of the screen. Fast forward a few years and MSI still had the same base layout for Z97 motherboards. There were minor updates – an XMP button, a proper overclocking menu layout, some help menus and fan controls, but it still had the same look and feel when other manufacturers were implementing ‘Easy Mode’ and a few other features to separate the common tools in the BIOS from some of the more esoteric. Now, MSI joins that crowd.
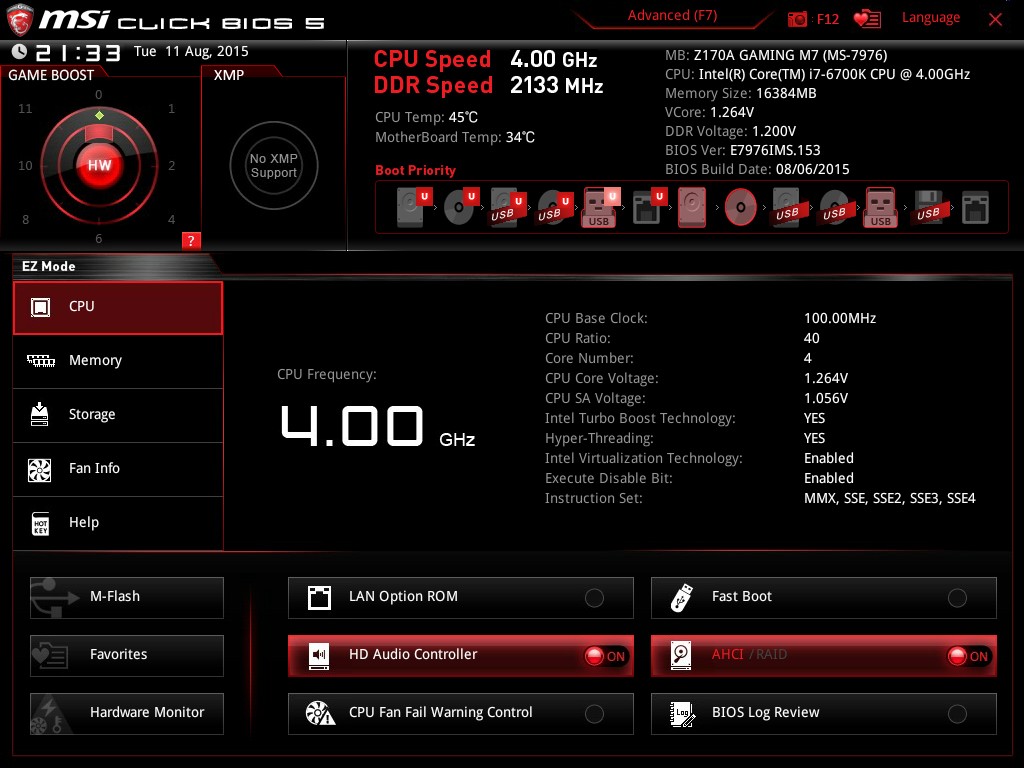
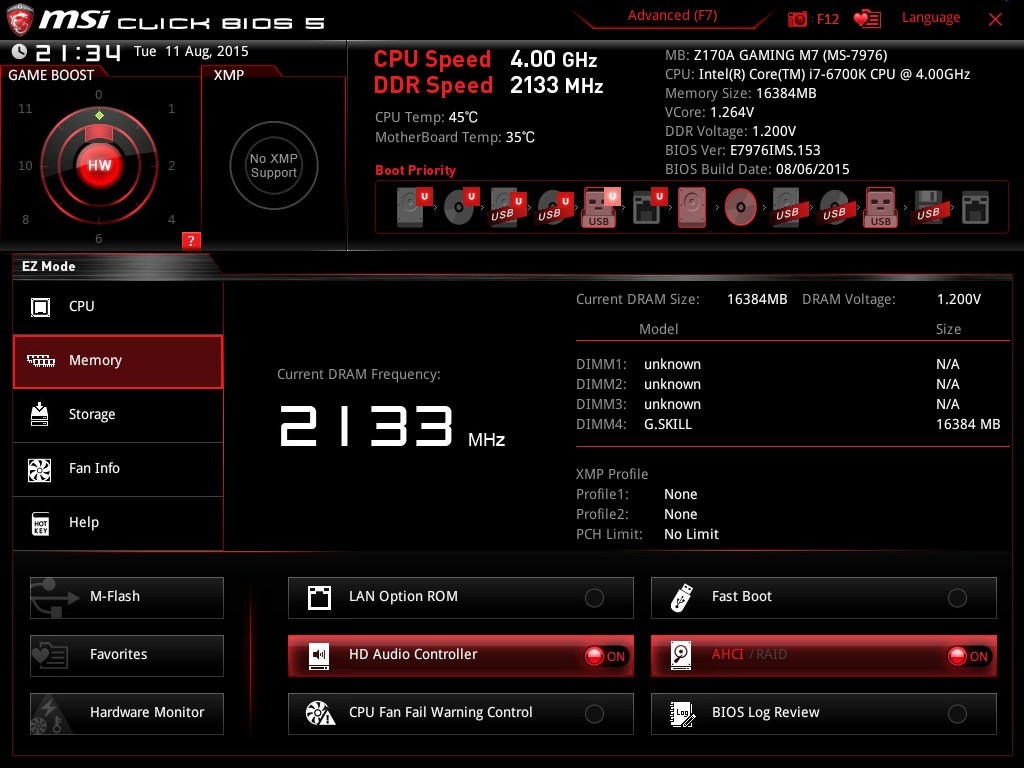
We still have the ClickBIOS nomenclature, but this at first glance looks like a nice ‘Easy Mode’. A BIOS gets plus points for system information on screen one – the motherboard, the processor, the speeds, voltages, BIOS version, temperatures and fan speeds. Rather than apply a thick layer, MSI separates easy mode into a few options on the left, so we have CPU info above, as well as memory info giving a per-module rundown:
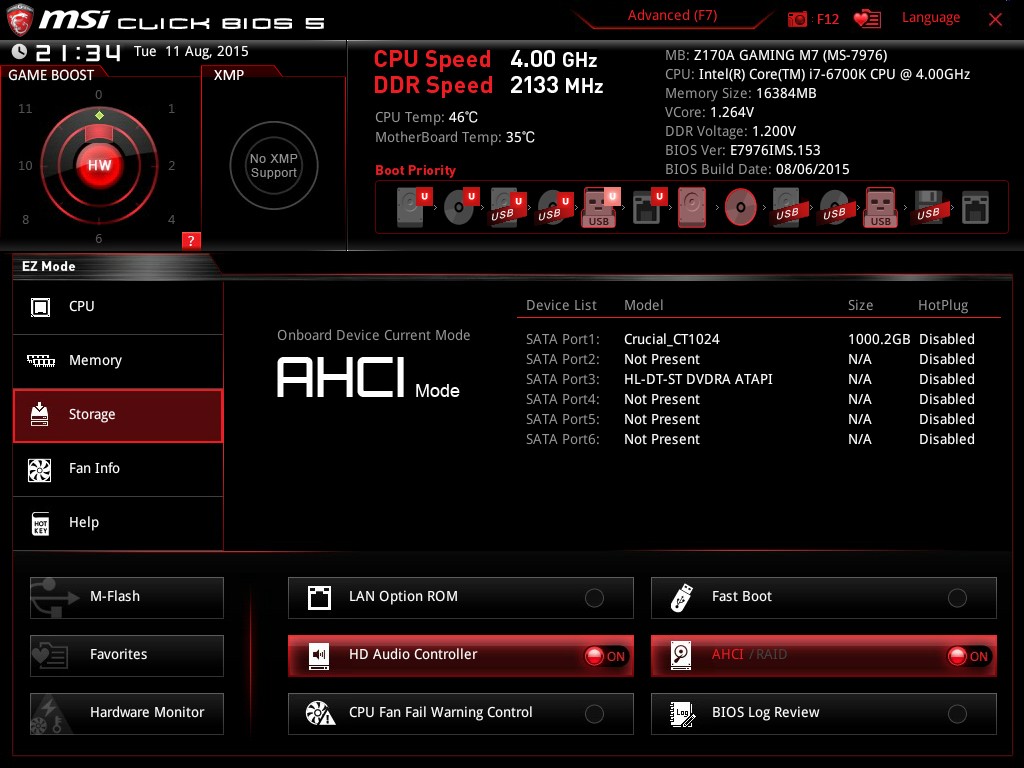
Storage:
As well as fan controls:
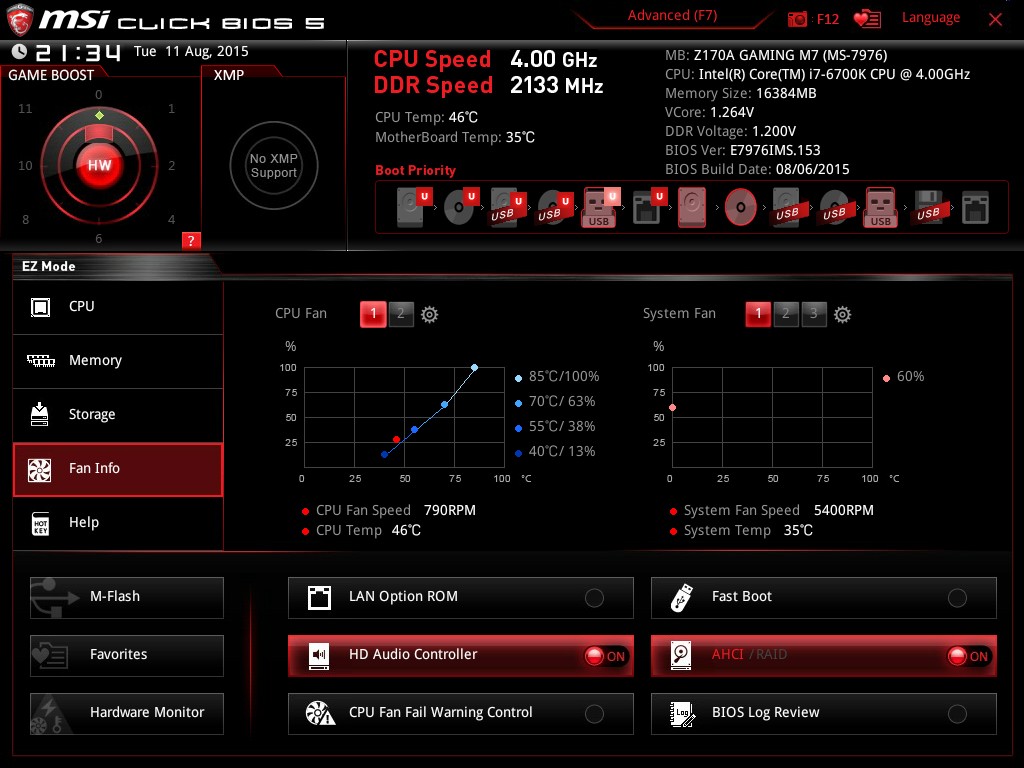
In the top left of the screen is MSI’s Game Boost button, so users can apply the auto-overclocks without opening the case and moving the wheel on the motherboard. Next to this is an XMP button for a one-shot XMP enable. In the fan screen above the fan gradients are not adjustable directly but there is a settings cog next to the fan numbers to take the user to the fan adjustment menu:

This fan adjustment menu is similar to previous MSI BIOSes, which when released was a nice touch giving users a graphical control over their fans.
Elsewhere in the easy mode is a help guide to show what settings the Game Boost does:
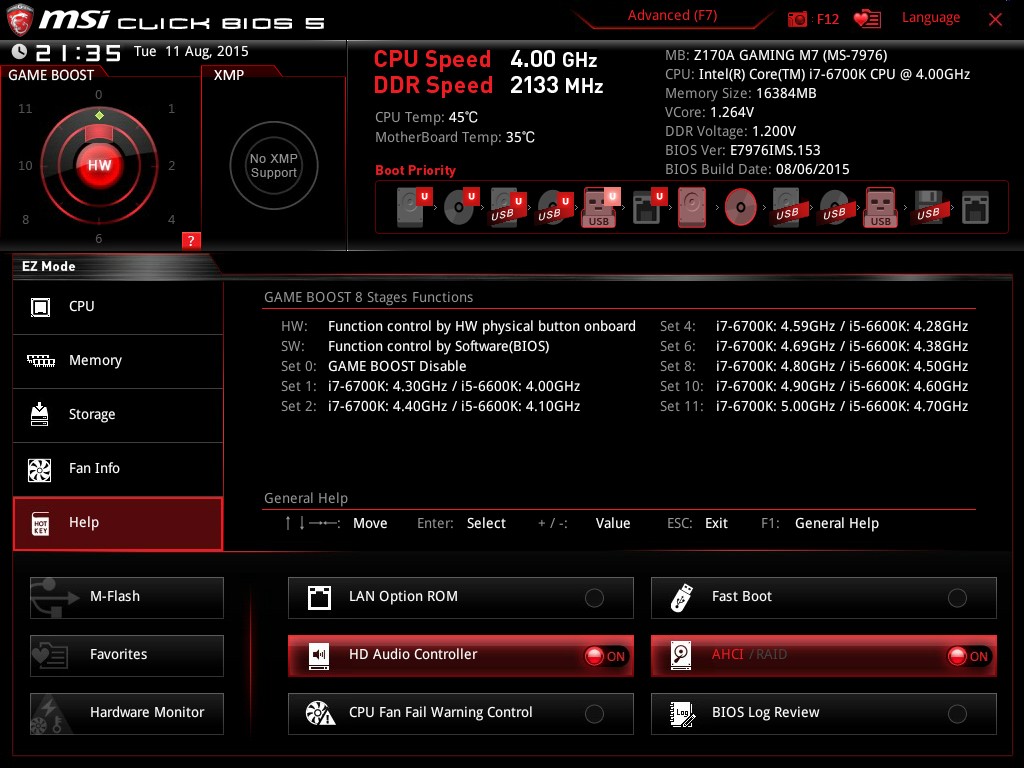
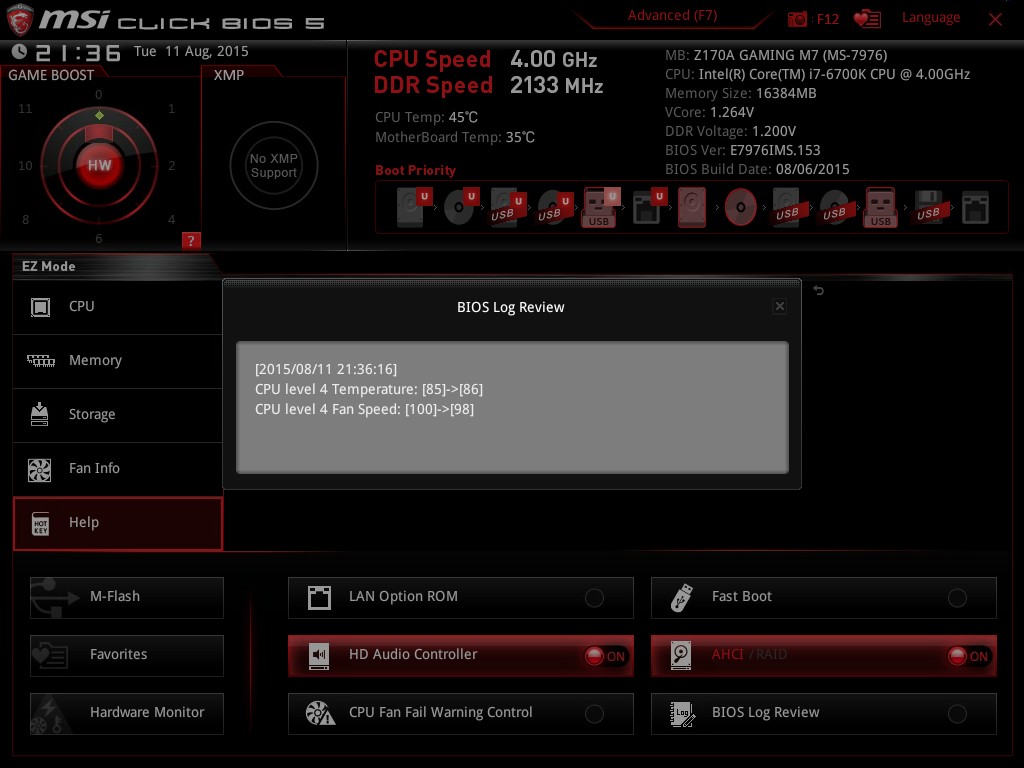
We also get a favorites menu, an option to flash the BIOS and the hardware monitor, which is another link to the fan control. MSI also links to the ‘BIOS Log Review’, which brings up a list of BIOS changes since entry, similar to what we have seen on other motherboards.
Pressing F7 moves into the advanced mode, which gets a lick of color by virtue of the Gaming brand design.
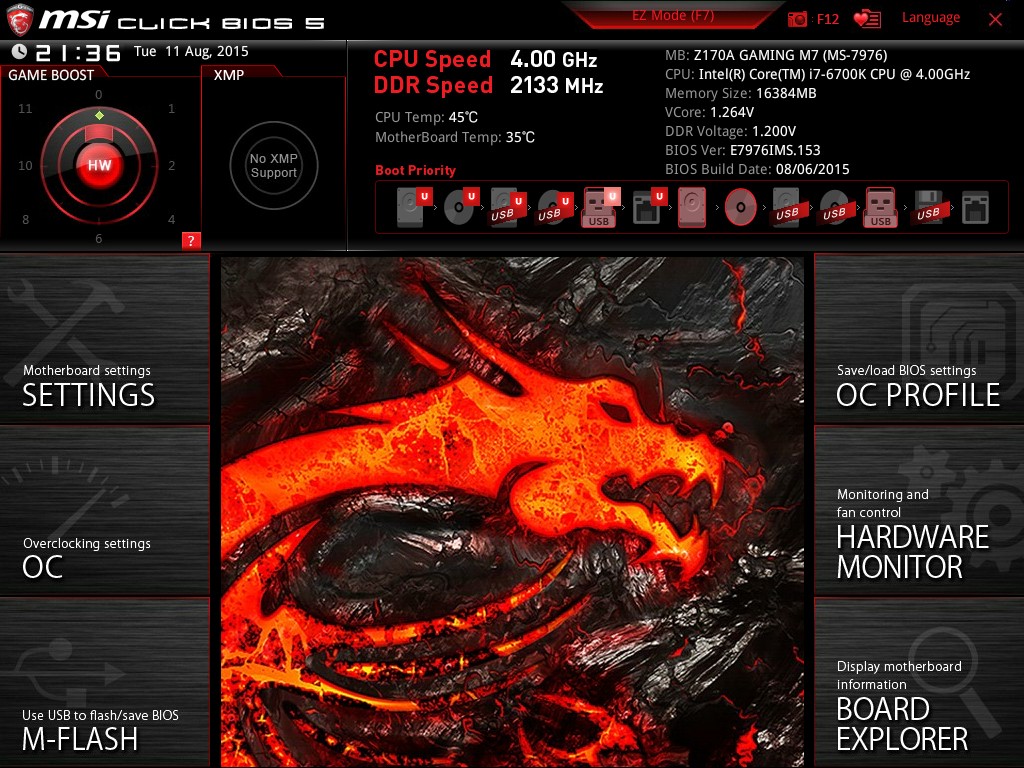
As far as the advanced mode goes, it runs in line with previous MSI BIOSes we have seen before. Each of the buttons around the sides gives access to different sub menus:
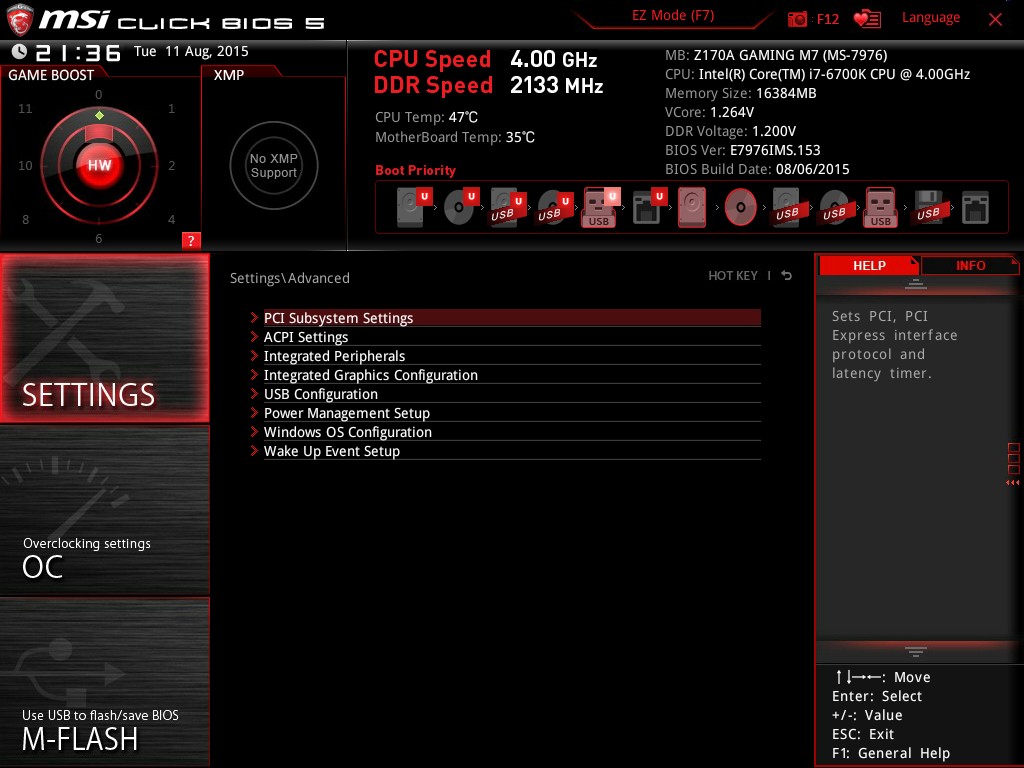
Nothing much out of the ordinary here. Although it is worth pointing out how to install Windows 7 on this motherboard – the option is in “Settings/Advanced/Windows OS Configuration”:
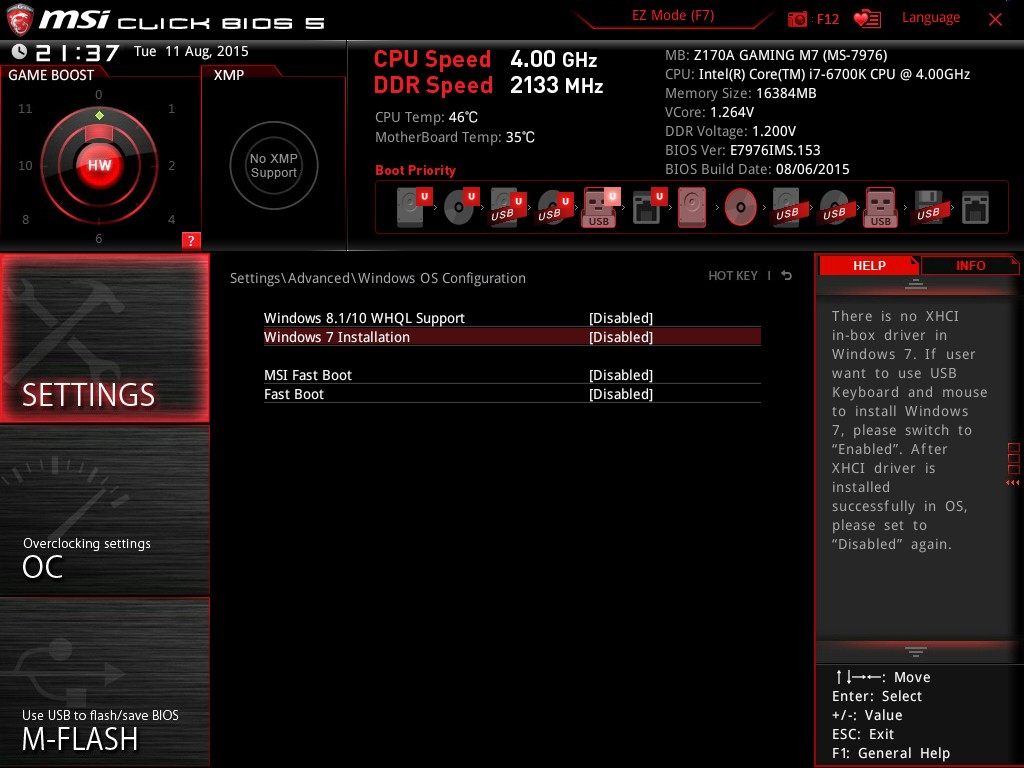
Put ‘Windows 7 Installation’ to enabled, and this will allow the user to use a USB mouse/keyboard during install. It is worth noting that Win7 has to be installed via a CD/DVD in this context as data-based USB drives are disabled. Normally we install an OS via a USB, and while the installation program for Win7 does start up, it refuses to find any OS version to install in an odd twist whereby the BIOS can read the USB stick but the USB stick can’t read itself.
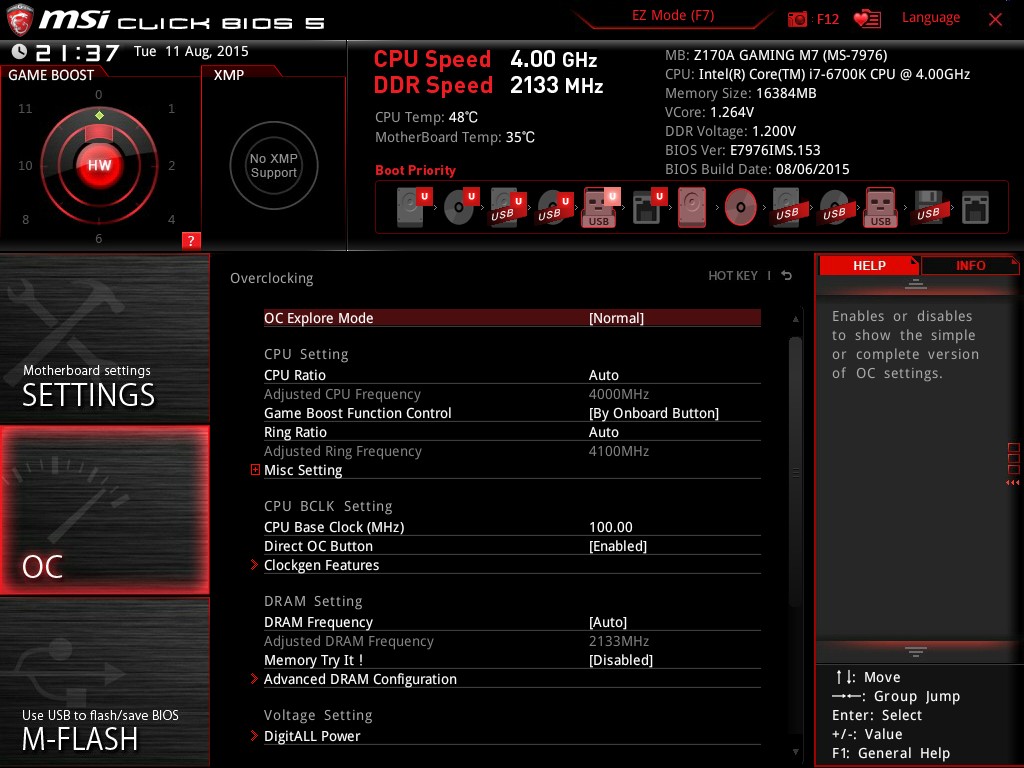
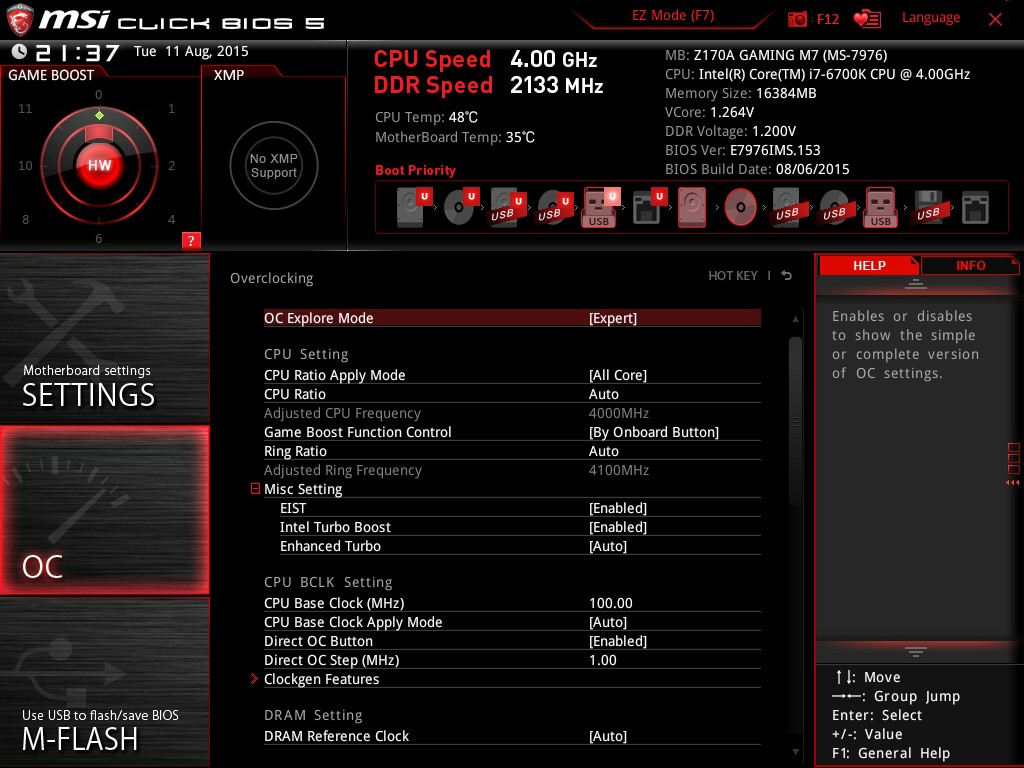
The overclock menu retains the new option we saw on Z97 by offering a ‘Normal’ and ‘Expert’ mode for those that understand the processor to a deeper layer by giving more options. Typically we recommend most users stay with the CPU multiplier and CPU voltage settings, which gives great overclocks for most – however extreme (sub-zero) overclockers always want more control.
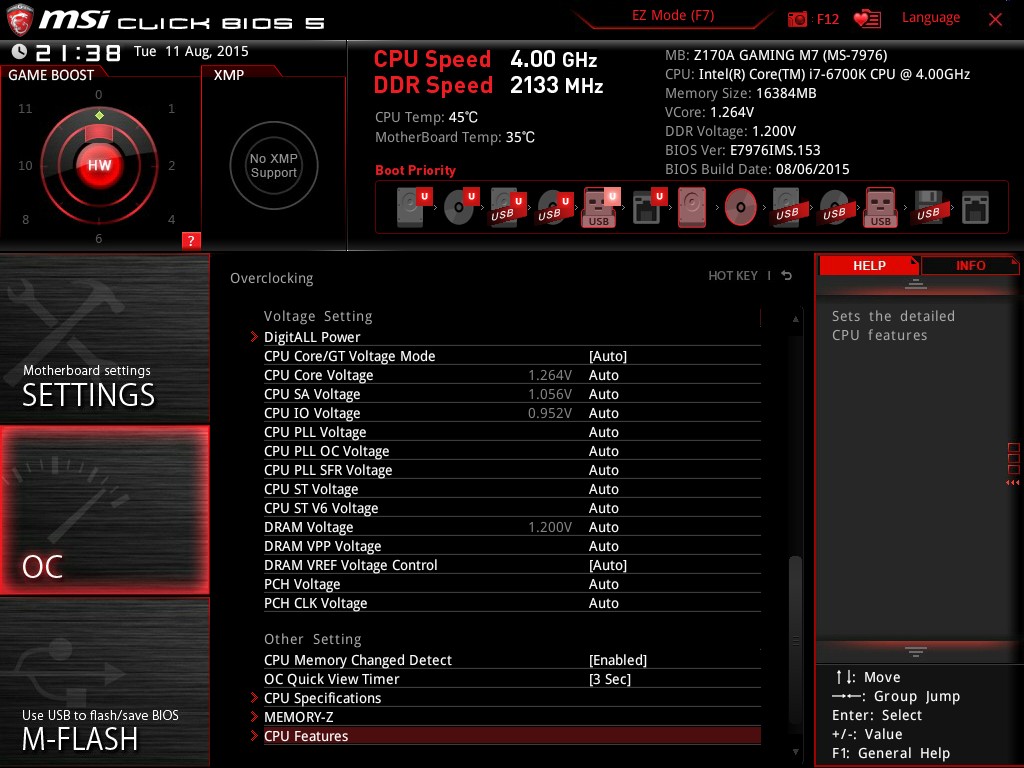
I’m going to point out a continual issue I have with MSI motherboards, and it relates to the VDroop control / load-line calibration.
The concept of this feature is to maintain a constant voltage across the processor (because drawing current causes a drop), and it helps with stability. Current processor design has an amount of voltage drop when the processor is being used heavily, in order to keep power consumption reasonable for the cooling used. However, for overclocking stability it can be adjusted with great benefit.
Other motherboard manufacturers understand this, and make the concept of this easy to understand. ASRock shows a graph of voltage drop with CPU load and five gradients, allowing a user to choose a gradient. ASUS has a series of options from Auto to Low to Extreme, with a recommended setting listed on the side. GIGABYTE also does something similar. With MSI, it makes no sense to anyone apart from the MSI engineer.
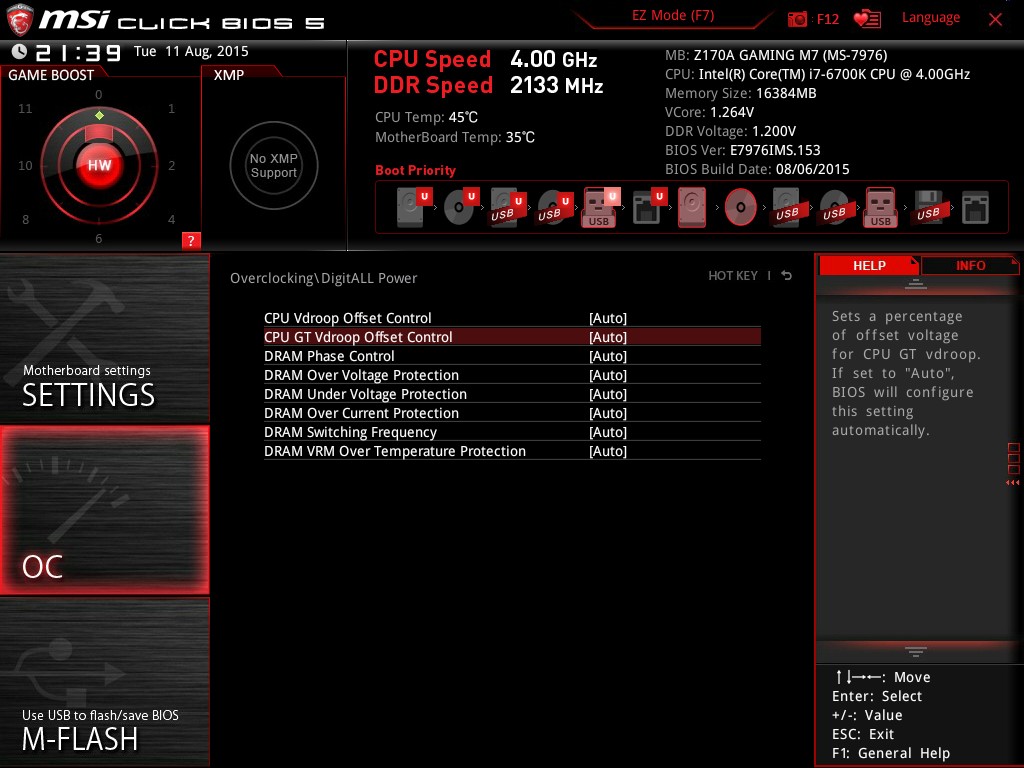
Here the VDroop Offset control comes in Low to High, but the values next to these names differ from +0% to +12.5% up to +100%. For anyone not an MSI engineer, +100% would automatically sound like ‘doubling’ the CPU voltage. This would mean 1.2 volts to 2.4 volts, which is crazy. This is clearly not what MSI is doing, but whatever that option does, +100% is the wrong way to describe it to an end user, especially one experimenting with overclocking for the first time.
I’ve emailed MSI many times about this, over many years, and even discussed it face to face, but it is very clear I am not being understood correctly. Sometimes I get an email back explaining what VDroop is. I know what VDroop is, but I don’t know what this control does because it is badly explained and the numbers mean nothing without context. ‘It should relate to load line level’ is the closest I have to a meaningful quote on this matter from MSI, but still no-one has explained the difference in pure scientific terms what going from +12.5% to +25% does, or what +25% even adjusts and to what degree. It clearly doesn’t add +25% to voltage, which is the only option VDroop is directly related to, so it might refer to some form of internal resistance. Well without a baseline, there’s no indication if +25% or +75% will go from a bad overclock to a good overclock or a quick VRM shutdown followed by the smell of smoke.
So I imagine that this option is fully understood by MSI engineers, and MSI’s internal overclockers who work on the motherboard and BIOS teams. But not everyone is an engineer, and there is a disconnect between the engineers and the teams that deal with users and the media in explaining certain features. Sometimes I receive critical feedback about MSI not overclocking as much as other motherboards – if this option was easier to understand, it might make a difference.
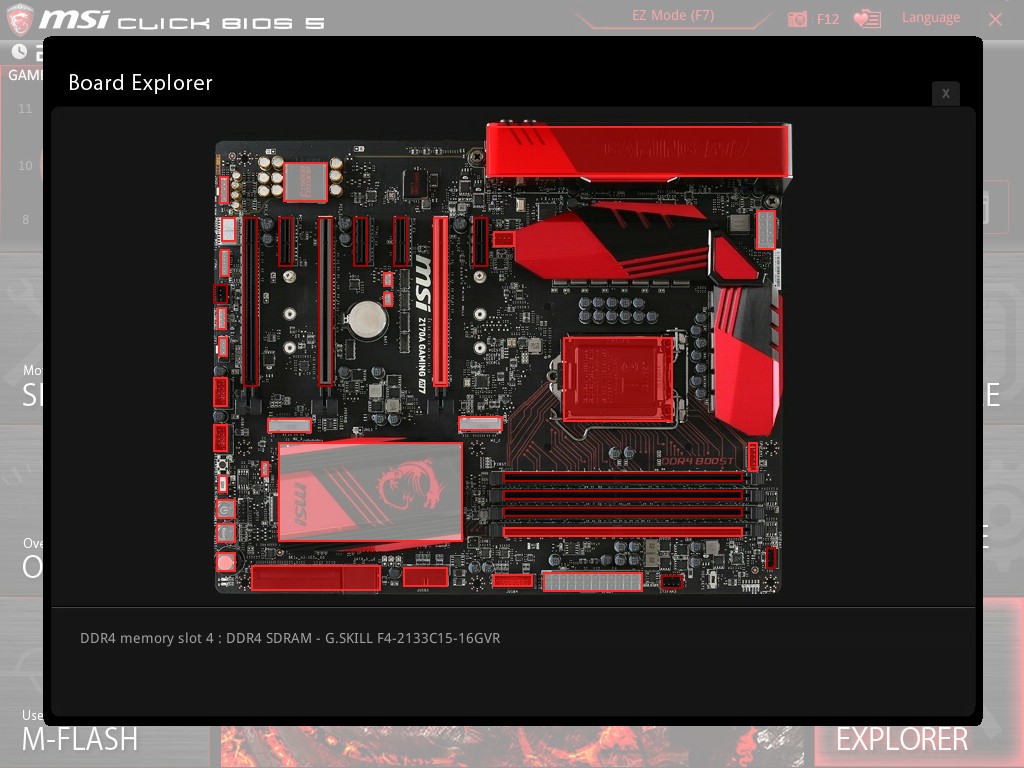
Ranting aside, the rest of the BIOS falls in line with flashing tools, fan controls, and Board Explorer:


56 Comments
View All Comments
DanNeely - Tuesday, September 22, 2015 - link
I suspect the problem is that they ran out of high speed IO lanes for USB3 ports, didn't want to put 2.0 ports on (if they did someone else would be flaming them for doing so), and since this is a mid price board decided against using an onboard USB3 hub to add more ports. Having two x4 m.2 slots are probably to blame. The 1xx series chipset has a lot more IO than the 9x series that it replaced; but without using USB3 hubs or PLX chips it doesn't have enough to max out a full ATX board.prime2515103 - Monday, September 21, 2015 - link
This whole lack of HDMI 2.0 in PC's needed to end like a year ago.Ian Cutress - Monday, September 21, 2015 - link
HDMI is still not native to the Intel integrated graphics yet without a LS-PCon or Alpine Ridge (extra cost), but chances are with this motherboard that people will be using a discrete card. Pick a modern HDMI 2.0 capable one and you're set.Gigaplex - Monday, September 21, 2015 - link
Such as... the latest AMD Fury series? Still not supported. I think only Maxwell supports it so far. We need better support from the industry as a whole.artifex - Wednesday, September 23, 2015 - link
I thought the industry was moving to DisplayPort?DanNeely - Wednesday, September 23, 2015 - link
The PC industry is trying to move that way (in addition to a few minor technical advantages, to avoid paying HDMI royalties; a few cents/port adds up when you're making millions of something); consumer electronics and home theater are very HDMI oriented though, so we're probably stuck with it indefinitely too.ruthan - Monday, September 21, 2015 - link
eSata - is someone realy using this? External sata HDD connection woub be nice, but what about power for HDD, some USB to sata cable?Where is added value in comparision with usual Sata bracket connected to internal Sata port?
Few years ago seems, that this problem would solve eSataP - with included power but this standard died and we are still using USB3 to Sata bulky converters.
Gigaplex - Tuesday, September 22, 2015 - link
I use eSATA. My 3.5" enclosure is mains powered, and eSATA is much faster than USB 2.0.ppi - Monday, September 21, 2015 - link
Since I was considering this mobo, is it possible to:a) Disable Killer NIC prioritization; and
b) Disable Nahimic effects (no equallizer)?
Thanks.
K_Space - Monday, September 21, 2015 - link
I thought the number of lanes has not changed from what Haswell offers (?16 PCI-E 3.0)?Then excuse the noob question with regard to the 20 PCI lanes:
If you have CF running and an M.2 x4 PCI-E 3.0 SSD; can you be run 8x/8x for the CF and full x4 for the M.2 SSD?
The reason I ask is that I have an Extreme6 Z97 with a R9 295x2 on the first PCI-E 3.0 and an XP941 M.2 SSD in their UltraM.2 slot (also PCI-E 3.0). According to the AsRock manual (and CPU-Z confirms), the 295x2 is running @ x8, and the M.2 at x4. If I attempt to install another 295x2 (not that it is a good idea) I'm informed the second card would have to drop to x4 (8+4+4). Given that the 295x2 is dual GPU and linking through PCI-E, latency with x4 will probably not be ideal (I recall reading somewhere that up to x8 link speed won't hurt the 295x2 CF but anything lower might).
I may be confusing quite few concepts here so your patience and detailed explaination would be much appreciated!!