Averting Disaster - A Guide To Computer Backups (2014)
by Brett Howse on May 21, 2014 9:00 AM EST- Posted in
- IT Computing
- Mac
- Apple
- Windows
- Cloud Computing
- macOS
Built-in Backup Tools Windows 8.1
While Windows 7 and Vista had the Backup and Restore applet, Windows 8 introduced File History as the default backup option. File History is a replacement for Previous Versions from Windows Vista and Windows 7. Unlike Windows 7, File History does allow backup to network shares for all versions of Windows 8 which is a good thing and makes the software far more useful. The downside is that scheduled System Backups have been removed from Windows 8 and 8.1. You can still manually create a system backup, and you can perform a system backup to a network share, but you can’t schedule this to be run. Also, File History only performs a backup of files in your libraries (Documents, Music, Pictures, Videos, and Desktop folders), as well as any files saved locally from OneDrive. Still, the most important information on your computer is your files, so let’s look at how to enable this feature to protect them:
- Windows 8.1 adds the ability to enable File History from PC Settings, however the options are just to enable File History and to select a backup target, so these instructions will focus on the Control Panel applet which offers more advanced options. To launch File History, right click the Start button and choose Control Panel. Next expand System and Security and select Save backup copies of your files with File History.
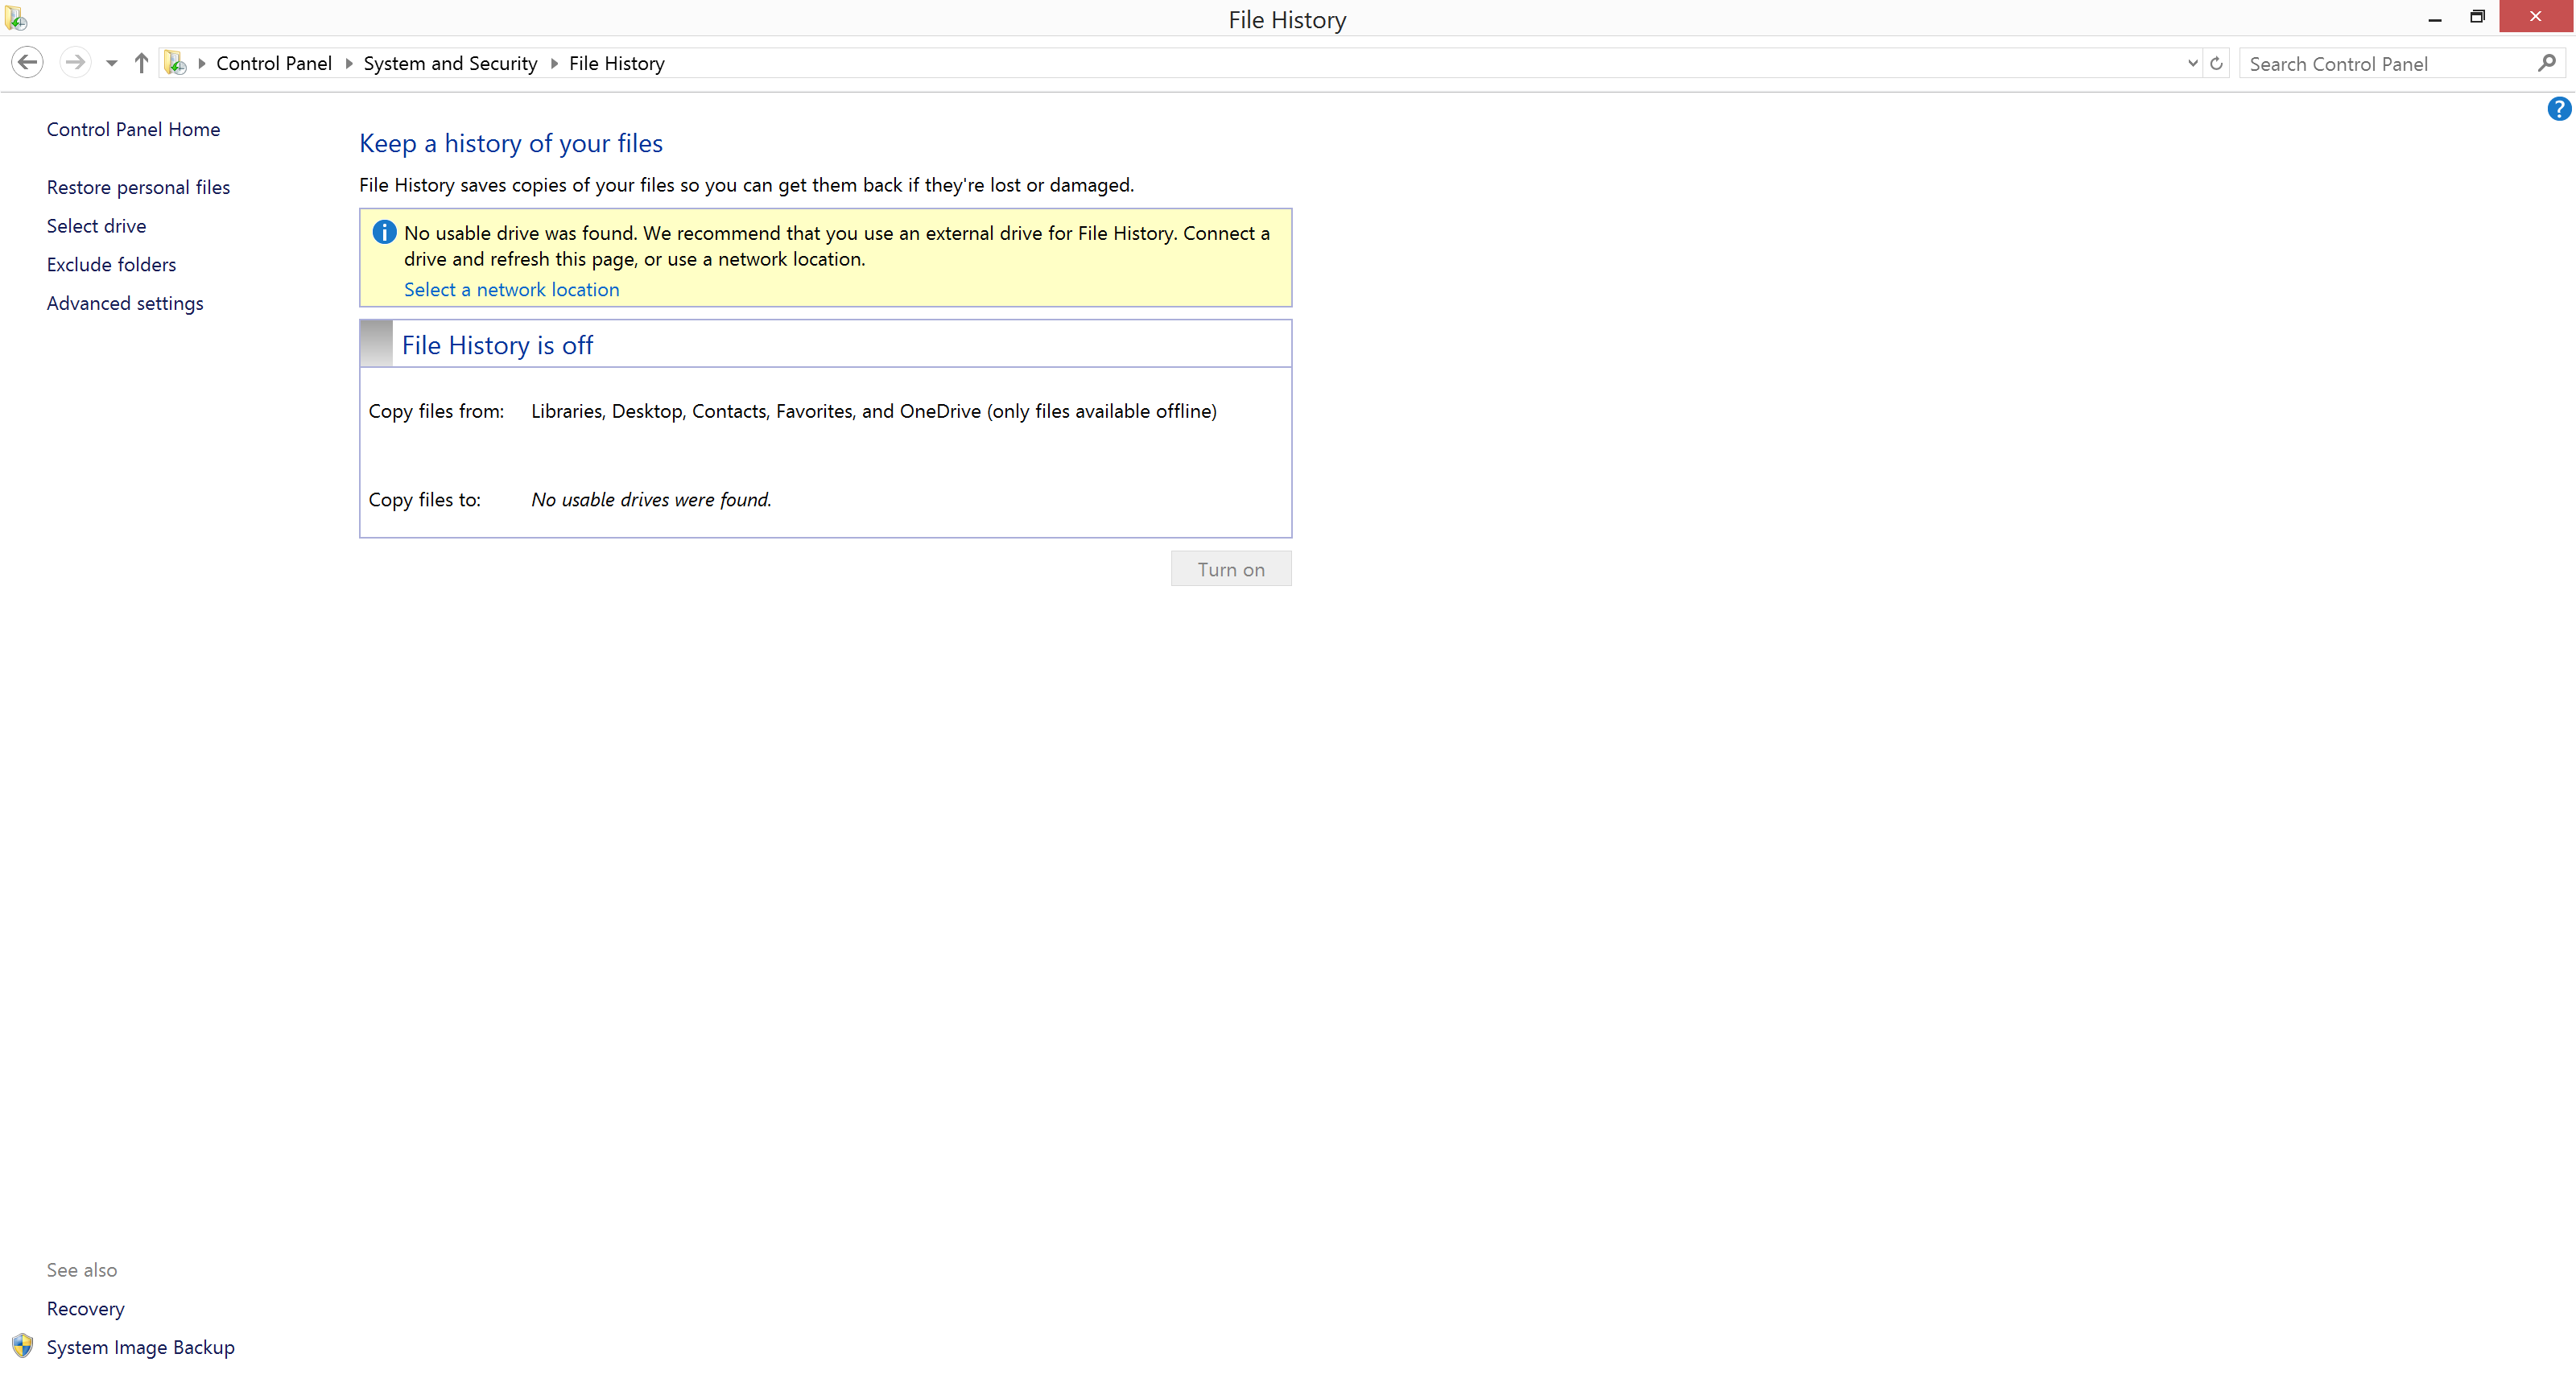
- If File History has never been configured before, the system will scan for available disks that it can back up to. You can choose the disk, or use the link Select a network location to configure the disk.

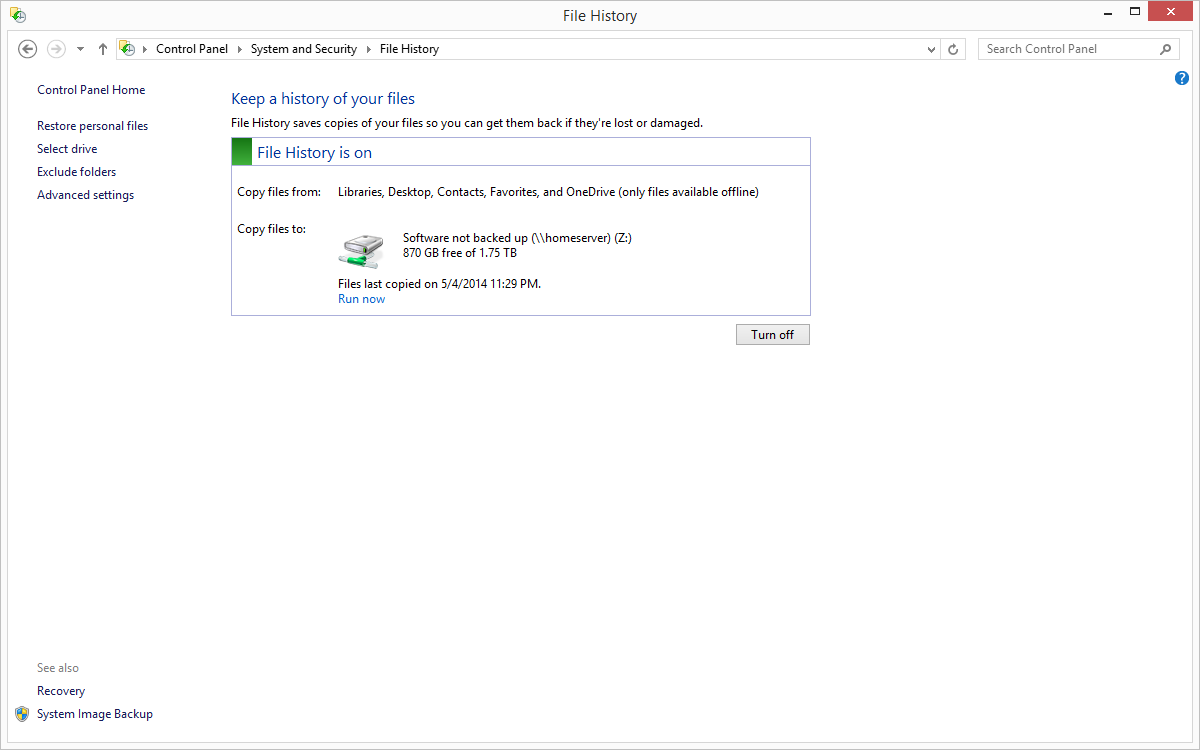
- Once configured, simply click Turn On, and File History is enabled.
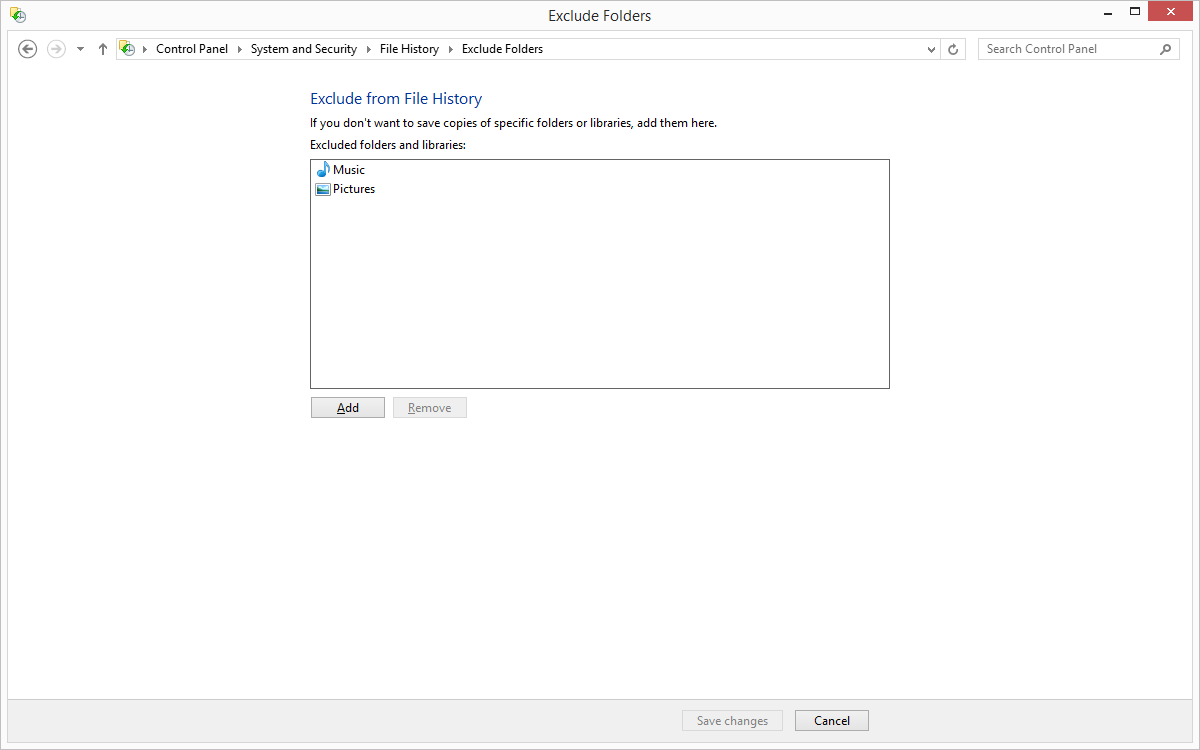
- If you’d like to modify your File History settings, that can be done in the File History applet. To exclude folders, choose Exclude Folders where you can select folders you wish to exclude from the backup. Unfortunately, you can’t add user defined folders here which you do want backed up. To add folders to be backed up, you either have to add that folder to an existing library, or create a new library.
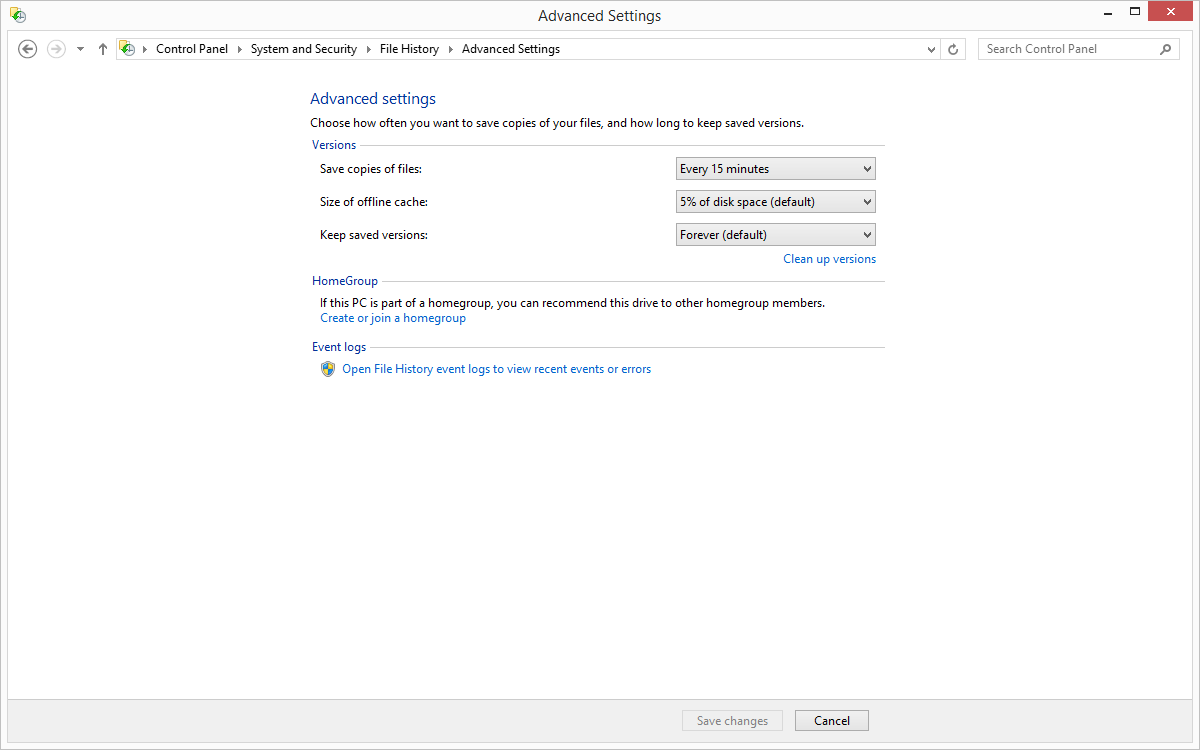
- Advanced settings are also available in the File History applet, and these allow you to specify how often to run the File History backup (from ten minutes to daily) as well as specify how much of the PC’s disk to use as an offline cache (2% to 20%) in the event you are travelling and not able to access your backups, as well as to specify how many versions of files to keep.


Unlike Windows 7, File History’s interface is all in the control panel. It’s not as elegant as Previous Versions was, where you could right click any file or folder and see a list of all versions, but the interface is fairly straightforward and does show you a list of all of the backups:
- Launch File History by right clicking the Start button and opening the Control Panel. Next expand System and Security and select Restore your files with File History.
- The interface that opens up will be a listing of the locations you are backing up. The most recent backup will be displayed by default. To restore a file, navigate to the folder it was in, select the file by clicking it, and then press the green Restore button to restore it to the original location.
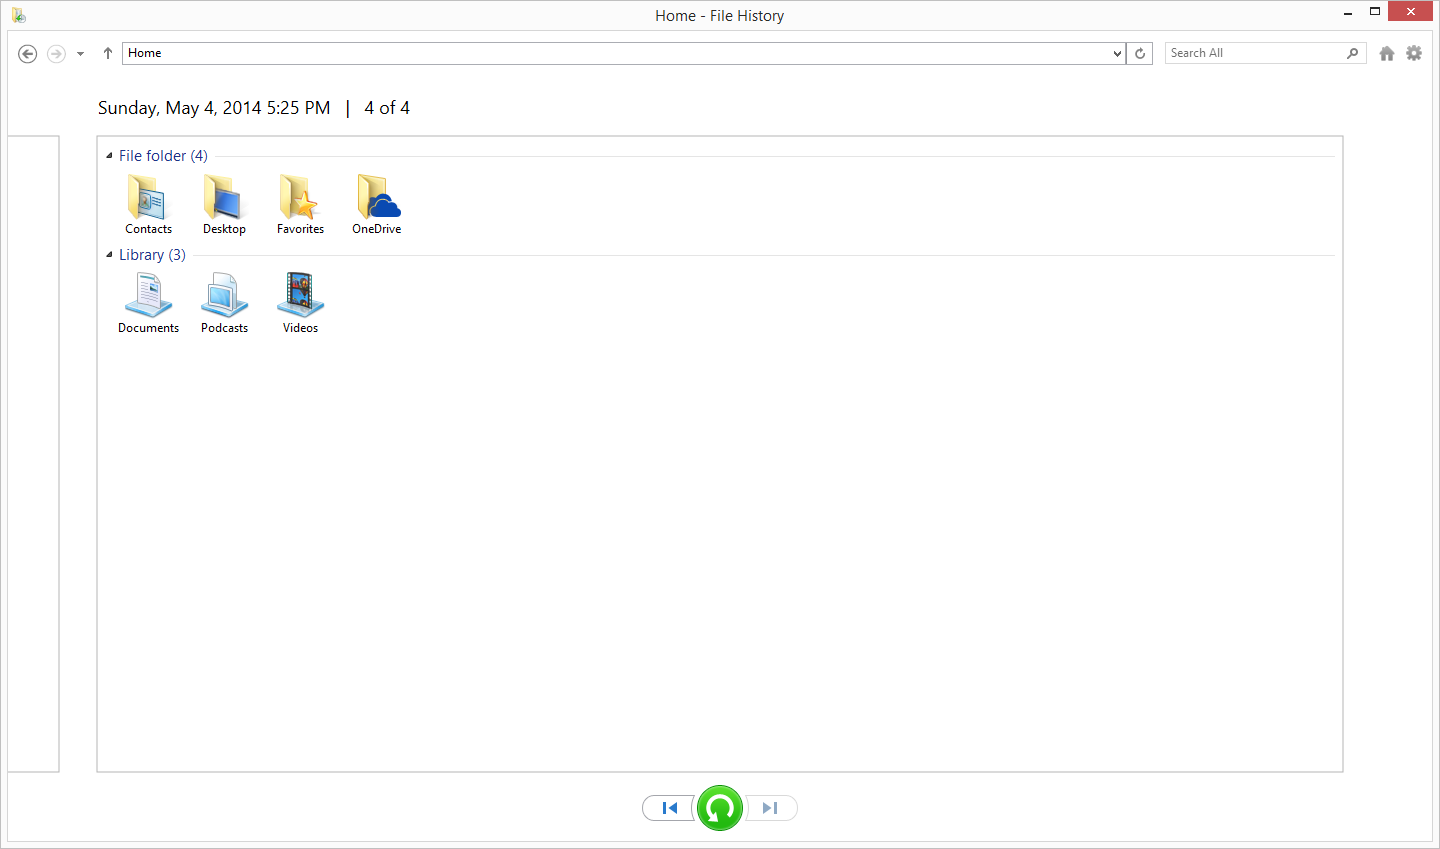
- If you’d like to restore it to a different location, right click the file and choose Restore To and then browse to your path.
- To navigate through your backups, you can use the skip buttons at the bottom of the page. The easiest way to sort though is to navigate to the folder where your file is (or was), and it will display only the backups that have changes in them. If a folder hasn’t been modified since you enabled File History, there will only be one backup for it. This is an easier method than trying to figure out which day you deleted a file.
Overall, File History is a decent built-in utility, but as is often the case, attempts to make the process easier to use often result in a system that is less powerful, and that’s certainly the case with this. Windows 7 lacked network backup for some versions, but overall the Windows 7 backup utility offered more features, especially with the automatic system backup. Previous Versions is also an easier way to find changes made to a file. File History also lacks a method of backing up files outside of your libraries and OneDrive folders which is not ideal by any means. Windows 8.1 forces you to make a system backup manually, and that can be done as so:
- Right click the Start button and open Control Panel. Expand System and Security, and then select Save backup copies of your files with File History which won’t actually be used, but is the shortcut to the System image backup.
- On the File History applet, click on System Image Backup in the bottom left corner.
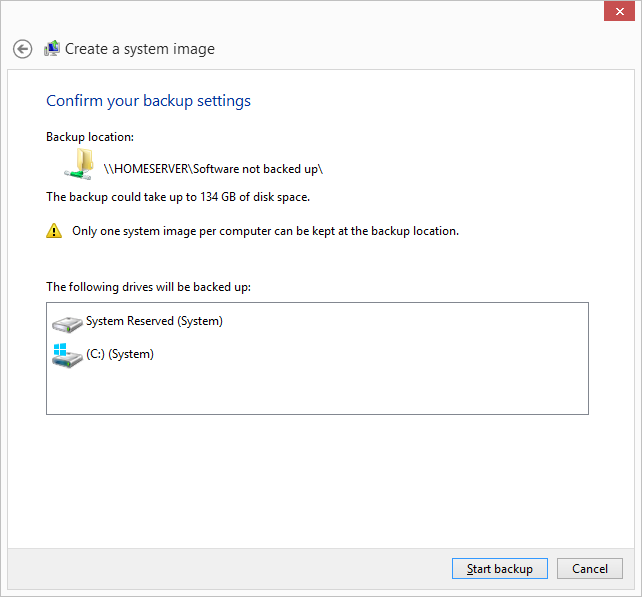
- Choose a location for your backup. If it’s on a network share, you can optionally enter login credentials if required. Click Next.

- Now you will be prompted to confirm, and if you are happy click Finish. The confirmation dialog will estimate how much disk space will be required, and warn you that only a single backup file will be kept. In other words, there is no versioning.
If you are using File History as your backup method of choice, you should definitely create at least one system backup to allow you to restore to a new hard drive or machine if necessary. If you ever need to restore this, you can create a recovery drive by choosing the Recovery option in the File History applet. If you don’t have another computer to create this on if needed, it’s a good idea to create one ahead of time.
It is possible to create full scheduled backups, but only from the command line using wbadmin but this is not something I would recommend for the average user.


133 Comments
View All Comments
tribunal88 - Wednesday, May 21, 2014 - link
Any reason that CrashPlan wasn't considered?DanNeely - Wednesday, May 21, 2014 - link
1) "Of course this list is certainly not exhaustive, with many companies now offering online backup solutions. A quick search in your favorite search engine will provide dozens of options. Be sure to choose the one that works best for you."2) Look at the 5th item on the bulleted list above the paragraph I just quoted...
antef - Wednesday, May 21, 2014 - link
CrashPlan is fantastic. I used to use JungleDisk with S3, but the software was forgotten and became problematic and buggy. I gave it up and switched to CrashPlan. The client is easy to use and backups seem to happen fast and reliably.Kenazo - Tuesday, May 27, 2014 - link
Crashplan's friend to friend option is amazing. I have 3 or 4 people backing up to my home NAS, and my personal pictures and important documents all back up to my PC at work.Haravikk - Wednesday, May 21, 2014 - link
For most regular consumers, CrashPlan is something I'd definitely recommend; it's pretty easy to use and has unlimited storage, plus if you like you can specify the encryption key that is used (though of course you then have to find a way to keep that safe instead). Given the pricing of cloud storage it's also pretty well priced. I'm sure there are other cloud backup services, but CrashPlan is what I'm using.Personally though I've gone for the total overkill approach; I have my Mac's main system volume which I'm about to switch over to RAID-5, a Time Machine backup volume on RAID-5, a Synology NAS (no RAID since it's only two-disk), and the NAS is also configured to heedlessly run CrashPlan to backup my files. So I have a total of three redundant copies of my data, albeit one in the cloud that is usually a day or two behind, and would take weeks to re-download, but in the event of a fire burning down everything else I'd rather have that off-site protection.
Still, I'd personally recommend local back-up drive + NAS for most serious computer users, especially if working with that computer is your job, as a single backup isn't enough IMO, as the last thing you want is to be in the middle of restoring your system, only for the backup to fail as well.
NonSequitor - Wednesday, May 21, 2014 - link
Be really careful about RAID-5. It protects very well against a complete drive failure, but drive corruption or a drive that starts returning garbage will trash everything on the disk. You need a RAID level that does double parity or checksums, such as RAID-6 and RAID-Z, to actually protect against almost all hardware failures. Of course it still is not then a backup.pdf - Wednesday, May 21, 2014 - link
The bigger problem is that with large modern disks, a drive failure in RAID5 means that you're extremely likely to encounter unreadable sectors trying to resilver a replacement disk. A drive that starts returning garbage during regular operation should cause no problem with any competent RAID implementation though.Also, RAIDZ is single-parity - RAIDZ2, RAIDZ3, etc are the multi-parity versions. The other bonus with ZFS-based RAID implementations is full checksumming of all data and metadata on-disk, plus COW snapshots, and the latter means it can actually serve the role of a self-contained backup solution, using something like zfs-auto-snapshot to provide granular, aged snapshots of changed data.
Morawka - Wednesday, May 21, 2014 - link
i havent heard RAIDZ recommended for 10 yearspiroroadkill - Wednesday, May 21, 2014 - link
What are you even on about?ZFS was only widely available in November 2005.
Mr Perfect - Friday, May 23, 2014 - link
Guess that's only eight and a half years then.