Supermicro SC750-A Extended ATX Full Tower
by Mike Andrawes on September 28, 1999 9:31 PM EST- Posted in
- Cases/Cooling/PSUs

At over 30 inches tall, the Supermicro SC750-A is one behemoth of a case. Then again, what else would you expect in a case equipped to handle both servers and high-end desktop machines? As noted in our Enlight 8950 case review, a bigger case can end up costing a pretty penny for real estate at a data center. Of course, being bigger does have a number of its own advantages.
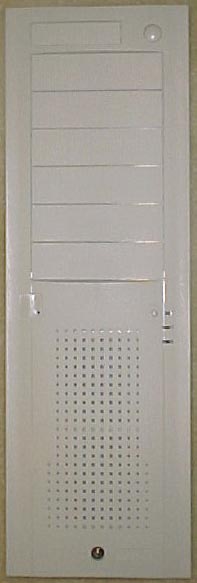
The front bezel simply snaps into the case and is made of a durable plastic that won't break or chip easily. A mechanical locking mechanism is placed at the bottom of the bezel that prevents unauthorized entry to the system. The power button is in the upper right corner, perfect for setting the SC750-A on the floor. Three LED's provide power, HD, and "turbo" status.
Since most motherboards lack a turbo LED output these days, this LED can be used for any other function, such LAN activity, overheat warning, or any other LED outputs that your system may have. Plenty of ventilation holes allow for excellent airflow into the front of the case. The back of the bezel features a washable air filter that prevents the uptake of dust into the case - a serious issue for a machine that runs 24 hours a day, 7 days a week.
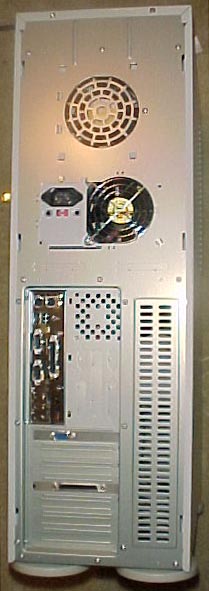
Each side of the case features large fan vents adjacent to the drive bays. Four large feet help keep this tall tower stable on any reasonable surface. At the rear of the case, you'll find the standard ATX I/O shield cutouts, as well as 3 SCSI and parallel/serial port cutouts. You begin to see the cooling prowess of the SC750-A as well after a glimpse at the rear. A 92 mm fan is mounted above the power supply and a 40 mm fan cutout above the ATX I/O shield. Of course, there's the 80 mm exhaust fan in the power supply as well. Ventilation holes above the expansion slots also help keep everything inside as cool as possible.

Getting into the SC750-A is a fairly easy task; simply tug on the bottom of the bezel to release it, then remove three screws to free each side panel. The side panel then swings out on "hinges" at the rear of the case. Once open about 45 degrees, the panel can be lifted slightly to complete the removal process. Thanks to the way in which the bezel snaps to the front of the case and a small lip on the side panel, it is not really necessary to use screws to secure the side panels if quicker entry is desired. The top panel can also be released by the removal of four screws - two in front and two in back. The design and construction quality of the case allow all panels to be removed with minimal effort.


0 Comments
View All Comments